In September 2020 my old Macbooks both died due to cooling issues. Both were quite old at the time – a 2015 MacBook Air and a 2009 MacBook Pro -, so this was pretty much inevitable, but it was still quite bad timing because it was virtually impossible for me to increase my income thanks to the pandemic and being risk group. I use a computer in almost everything I do and both the machines I had were now crashing randomly and making it quite difficult to get any work done at all. So, after scraping all my savings together and getting generous support from you wonderful people via Ko-fi I finally decided to embark upon the journey of abandoning Apple hardware and going the Hackintosh route, which means installing Mac OS on a PC. I used to repair PCs for a living and this just seemed like the right choice after my 2015 MacBook Air started crashing randomly after only one year of use. I investigated the issue when it started happening and it turned out that the cooling issues present on that particular machine were actually systemic. It was just out of warranty and this seemed to be happening with MacBook Airs, MacBook Pros, iMacs and I was quite angry about it, since I had spent a lot of money on that machine so that it would last as long as all my previous Macs. It turned out that virtually every recent Intel Mac suffered from this problem, causing throttling and early thermal death like on my 2015 MacBook Air. The issue here was not as much one of Apple’s designs, but was due to the increasingly hot temperatures of Intel’s processors that were quite incompatible with the slim and passively cooled Mac design philosophy. In retrospect it’s really no surprise that Apple decided to go the route of using their own processors in the end, the all new M1 architecture, because the cooling issues caused by Intel’s chips were starting to give Apple a bad reputation. By the way, if you’re already tired of reading, here is the video that goes with this blog post:
Why Hackintosh?
Apple’s new architecture M1 runs significantly cooler than Intel and it could have been a really good choice if my MacBooks had died a year or two later, but of course Apple only just announced their architecture transition after my MacBooks broke and practically none of the software I use was compatible when they launched. Even now, half a year later a lot of the software I use is still in Beta. Also, I actually need Windows compatibility for my Pakon Scanner and for various other reasons, so one of the new M1 Macs would be a pretty expensive paper weight for the way I use my computer! I even needed to stick to an older version of Mac OS – namely Mojave – so that all my music production plugins still work since Apple already abandoned 32Bit support in the already outdated Catalina. Going the Hackintosh route was also a way of getting more performance for my money, since I could get a pretty powerful desktop machine for the price that I would have normally paid for a laptop.
Is it future proof?
Well, for now, yes, Hackintoshing still makes sense since Apple still sells Intel Macs and this means that they are going to continue supporting Intel Macs for quite a while still. During their previous architecture transition from PowerPC to Intel we learned that they supplied their PPC Macs with security updates until 5 years after the last PPC Mac was sold. This means a Hackintosh built right now is going to have support for another 5 years at least and that’s practically an eternity in computer hardware terms, so it will be about time to upgrade anyway by the time Intel Macs aren’t supported anymore.
PC vs Mac
So, what do you need to build a Hackintosh? Well, a Hackintosh is simply a PC which thinks it’s a Mac. So what’s the difference between a PC and a Mac? Well, PCs have a standard architecture (usually x86) and this means that all the components on the market fit certain standards that make them fit together in a specific way. Windows then has the drivers to support all these different hardware components and makes them talk to each other. This can be good and bad – it can significantly reduce prices because there is quite a lot of competition in the PC component market – but at the same time driver issues are very common and they tend to cause the infamous blue screens and instability issues that plague Windows. Macs don’t have that problem, because only Apple sells Macs and they choose all the hardware that goes inside. They only supply the drivers for these components and this means that such driver incompatibility issues aren’t quite as common – although you can still easily crash a mac with an incompatible printer driver. For a Hackintosh all this means that you can only use the hardware that Apple uses or you won’t be able to install Mac OS. And even if you manage to install it you might not get your components to work or have problems with certain Applications not running as expected.
Computer hardware 101
Instead of just showing you my list of components I thought I’d keep this beginner friendly and explain what exactly goes into a computer before getting to the parts themselves and then you know exactly what I’m choosing and why.
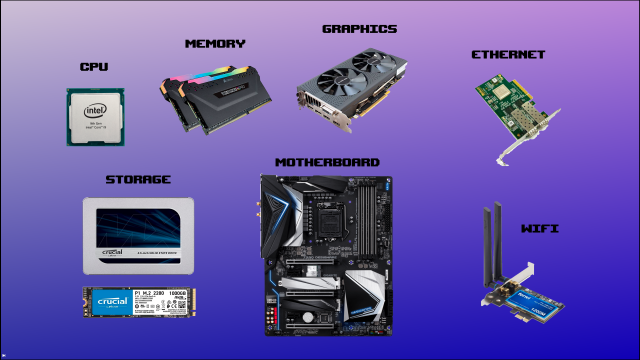
So, computers have a few components in common no matter whether we’re talking about PCs and Macs: All computers need a central processing unit or CPU, they need working memory or RAM in which to load applications, they need some kind of permanent storage to save the operating system and files – nowadays these are solid state drives of various forms -, they need some form of graphics processing either on the central processing unit or on a separate graphics card, and lastly they need a Mainboard to interface all these components together. The Mainboard might have all sorts of additional functions like a sound card, wifi or ethernet networking and they usually have additional interface options for one or more extension cards that can extend functionality further. In general since it’s all standardised it’s a bit like Lego, just with electronics, you just plug different components together and if the parts are all compatible you have a working computer. But of course, the operating system needs to have the drivers for all this stuff and this is where Hackintoshing can be tricky. So, to build a Hackintosh the only thing we need to do is pick the right compatible components and then we can install Mac OS and get everything to work. Sounds simple, right? Now, how do you pick those components and what do you have to keep in mind? Now, before we get into the parts, let me remind you that as always product links are likely to be affiliate links. When you use those links you can support what I do at no additional cost to you and I earn a small commission. These are the exact components I use though, so I’m only recommending things that I have successfully used myself!
CPU
In the PC world there are at the moment two big CPU manufacturers, Intel and AMD. There are a few more of course, but those are usually not as general purpose and not as widely used. In the Mac world we only have Intel, because that’s who Apple chose to work with when they decided to switch to the x86 architecture. This means that to have a fully compatible Hackintosh we’ll also need an Intel processor. Nowadays Mac OS can be installed on AMD too, but generally this is more tricky and you might run into more incompatibility issues. I’ve read of many problems with stability and also certain Apps being incompatible because they use processor functions that AMD simply doesn’t have. So, it can be done and AMD processors tend to be cheaper for the same performance, but it creates more hassle and I really wouldn’t recommend it for a beginner or if you need reliability. I went with an Intel processor myself, an Intel Core i9 i9900K which is a really beefy processor with integrated graphics.
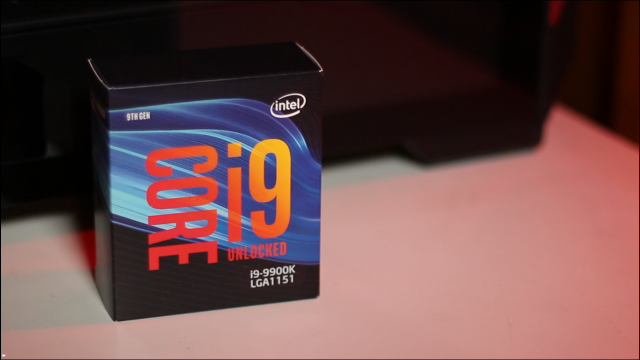
I chose this one because I need it for converting Canon Magic Lantern raw files to DNG and this uses the processor and not the graphics card. I didn’t really need the integrated graphics because I wanted to use an external graphics card, but it was just marginally more expensive and this way I can continue using it even if the graphics card fails.
Cooling
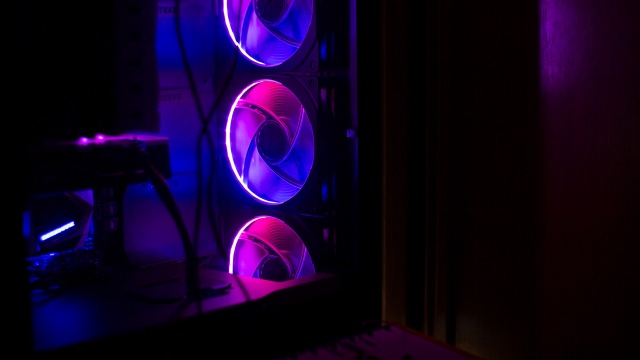
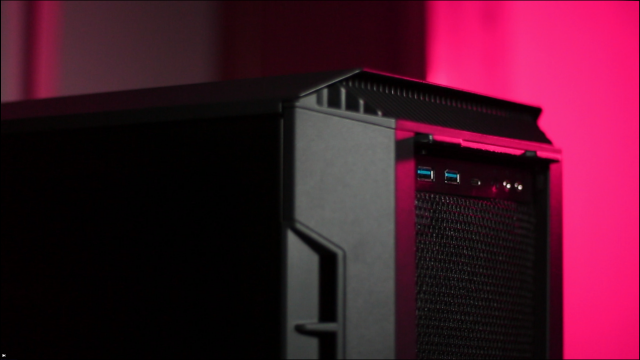
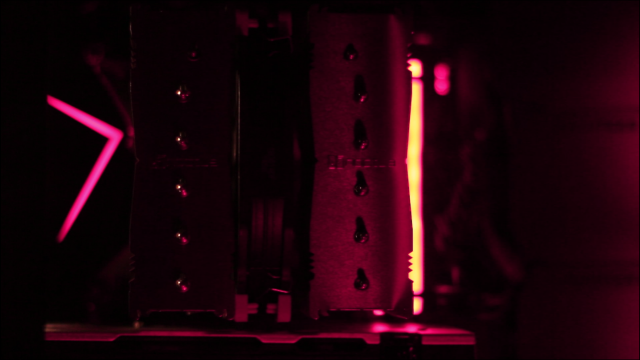
Since the Intel processors are really to blame for the cooling problems in Macs it’s something that we need to address for a Hackintosh build too. The downside of the really beefy processor I chose for my build was that it’s practically a space heater, it gets really really hot. So, to compensate for this I went for a good airflow case, the Phanteks P600s.
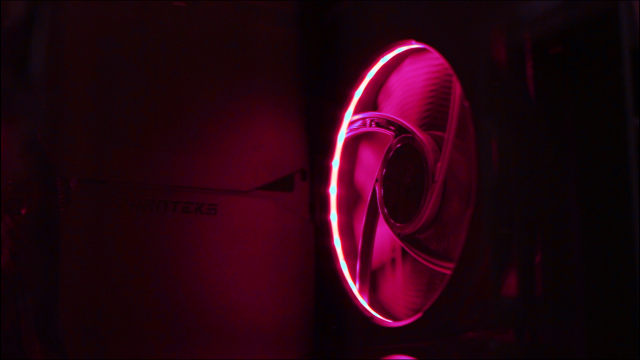
This is actually a double function case since it has a mesh for great airflow, but also sound proofed panels that can be taken off for performance. Therefore this case is silent AND has good airflow, which was really appealing for me. The other thing that’s really good in this case is that it has lots of space for drives too, so I can extend my storage for photo and video files quite a bit before I run out of space. The fans that come with the case are actually quite good too, but they aren’t very quiet so I decided to swap them for be quiet! Silent Wings 3 fans and the configuration I chose in the end were 3 fans in the front, 1 fan in the back and 1 fan in the top right above the CPU cooler, so 5 fans in total.


I tried 2 fans in the top too, but it just syphoned off too much air before it even reached the processor, so it wasn’t ideal. To cool the CPU itself I chose the beefiest air cooler I could find, which was the Noctua NH-D15S. There are two versions, one the chrome with a brown fan and the other a black version with a black fan. I would have bought the black version if it had been available at the time, but instead I had to buy the chrome version and a black replacement fan. Good on them for finally making this cooler in a better colour scheme, the brown fans just look pretty bad if you have a tempered glass window in your case!
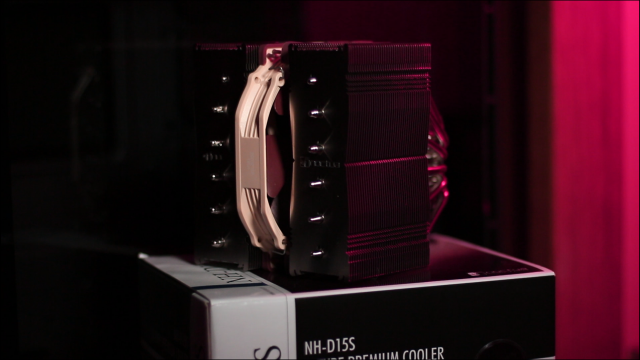
Getting the black version is definitely more economical if you want it black, but if you don’t care about looks, the chrome version tends to be cheaper. There is a version with 2 fans too, the Noctua D15, but after ordering that one initially I realised that it wasn’t compatible with my mainboard and I needed the asymmetrical version instead. Both are essentially the same cooler though. The D15S is humongous, and when I took it out of the box the first time I laughed, because it’s just comically big. No wonder that Apple abandoned Intel if this is what it takes to keep their high performance processors cool! I could have of course gone with water cooling too, but I have never been comfortable with water in my system and I’ve heard so many horror stories of leakages that I didn’t want to risk it! Also, I find pump noise way more annoying than fan whoosh, so air coolers are definitely the better option for me. Contrary to popular belief water cooling is not necessarily quieter than air cooling in general. They do however get rid of some of the space issues caused by massive CPU heatsinks, so if you have trouble fitting a beefy air cooler on your mainboard, maybe check out whether watercooling might solve your space problems!
RAM
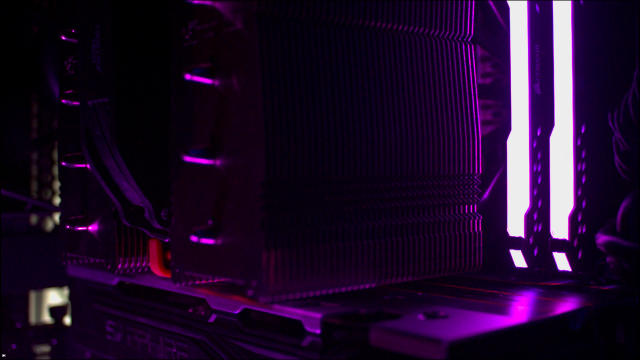
The main issue with choosing RAM is that it has to be compatible with the mainboard, so it’s always a good choice to check the lists before buying anything. Once you have figured out what kind of RAM is compatible you have to choose the speed and the amount of it. With this kind of thing, faster and more is pretty much always better and this is something I wouldn’t skimp on because it’s one thing that makes your machine last a lot longer. I personally chose 32GB of 3200 Corsair Vengeance RGB Pro RAM.
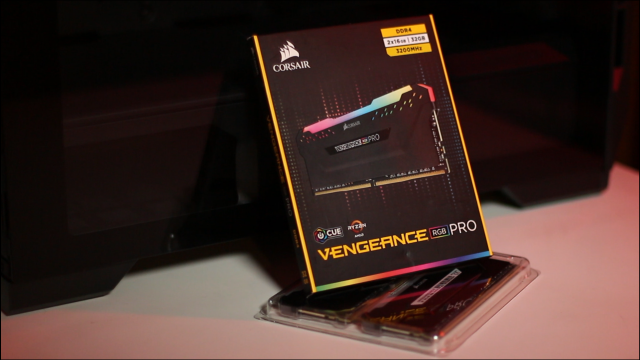
I needed a lot because I edit video and 3200 was the sweet spot between price and performance at the time when I ordered it. For video editing and music production a lot of RAM definitely helps, but for photo applications you might not need quite this much. I edited photos with 16GB of RAM for a very long time and never had an issue, but for video it was always a bit too tight. However much RAM you choose, ideally you should buy it in 2 RAM sticks. So, if you’re buying 32GB, buy 2 sticks of 16GB, for 16GB go with 2x 8GB. By the way I would not recommend going below 16GB in this day and age. In total the processor I chose can handle 64GB of RAM and I still have RAM slots left, so I can still extend the RAM if I need it. At the moment it seems to be enough though.
Storage
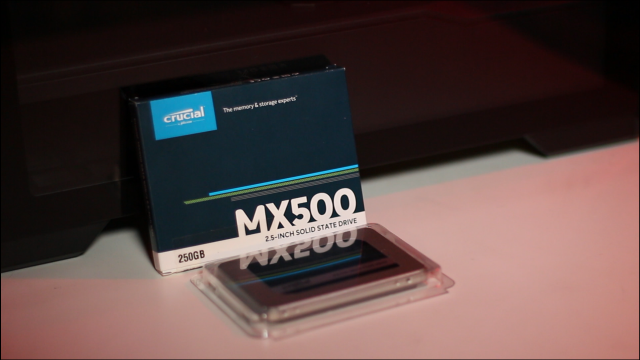
After a lot of research the best option for permanent storage if you want to have a dual boot setup with Mac OS and Windows is actually to have each operating system on a separate SATA SSD drive that can be unplugged during installation to avoid confusions. The size of it depends very much on what you want to do, but don’t go any lower than 256GB or you’re going to run out of space in a heart beat. In fact, if you do music stuff, aim higher since music plugins and samples take up way more space than you’d expect. I would also suggest that you get an additional SATA SSD for backing up your Mac OS since things can go wrong during updates and without a bootable backup you might not be able to recover your system if a backup goes awry. And believe me, they do go wrong sometimes with Hackintoshes, I learned that the hard way! One time I was feeling brave and did two updates at the same time (bad mistake) and I had to reinstall everything because I didn’t have a bootable backup yet! Learn from my mistakes! After that I got a backup drive too, so now my configuration is this: two Crucial MX 500 SATA SSDs , one for Mac OS and one for Windows and a 240GB Kingston drive as a bootable backup for Mac OS.
If you don’t need Windows on your machine, then you can also go with one of the faster nvme drives, but keep in mind that in actual use there is no performance gain unless you copy a lot of very large files from one nvme drive to another. I personally installed a 1TB Crucial P1 nvme as a Video scratch drive and that works well for me.
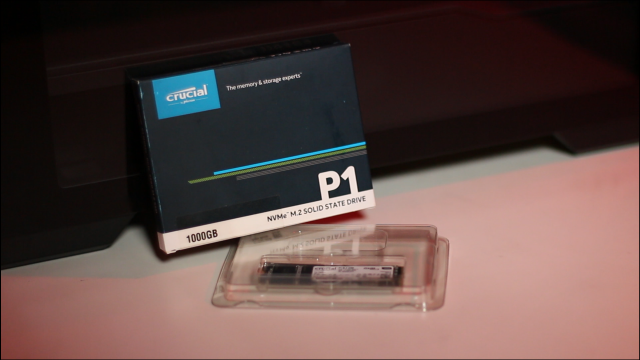
By the way, before you buy an nvme drive, make sure you know exactly what you’re buying. Some of them slow down when you write too much at once and the P1 is one of them. I knew this and didn’t mind since this issue only appears when dealing with files that are larger than 100GB which practically never happens in my own workflow. If you’re working with very large files, choose a different nvme drive!
Graphics card
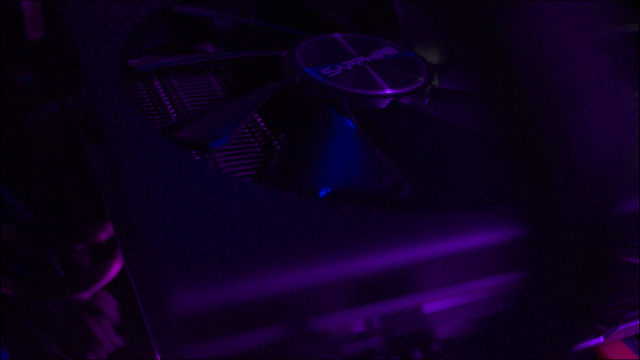
You can use the internal graphics on Intel processors and this generally works quite well, but if you want to do video editing or music production I would suggest you get a graphics card too if you can get your hands on one. Choosing the right card might actually be a bit tricky depending on which operating system version you want to use. First of all NVIDIA cards are generally not supported anymore unless you want to use a very old version of Mac OS with a very old card that is still supported. Current supported cards are all AMD cards and which one you can choose there depends again on the version of Mac OS. I needed Mac OS Mojave, so the newest card in the consumer bracket that was compatible with this was the RX 580, which is already a few years old. It’s surprisingly powerful considering how old it is and can even run 6K braw footage in a 4K timeline which really surprised me. Generally I haven’t needed any proxies at all for anything I threw at it so far and this 2.5K CinemaDNG files, 4K and 6K braw as well as Sony A7c footage. I’d say it’s a really great card if you want to edit video on a budget. If you don’t need 32Bit support you can also choose a newer card like the RX 5700 XT, but keep in mind that right now you might have a bit of a problem finding any graphics cards at all – we’re going through a global chip shortage – and in my view the performance gains over the RX 580 are not worth double the price, especially since the RX 580 can already handle every format I need! RX 6800 and RX 6900 cards are also supported under Mac OS now – *but* only under Mac OS Big Sur and they are practically impossible to get your hands on anyway, so they are probably not even an option right now.
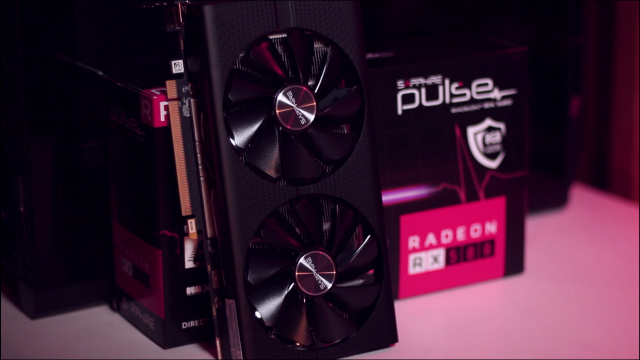
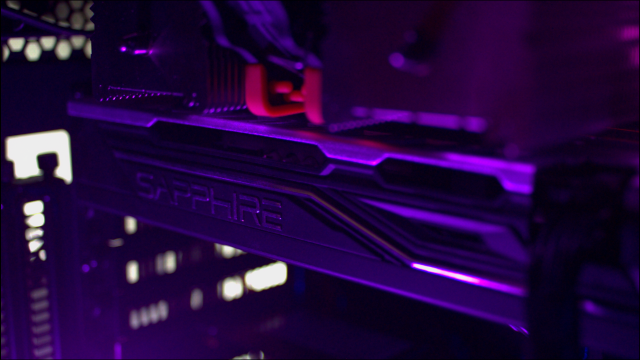
Also, keep in mind that it’s not enough that it says “RX 580” on the card. There are third party manufacturers whose cards lead to Kernel panics under Mac OS, so make sure to check the lists before buying anything. I personally use a Sapphire Pulse RX 580 and that works quite well. Also the Nitro+ version supposedly works well and runs a little cooler, but do double-check! As for video memory: Go for at least 8GB if you want to edit video! And if you just had a little heart attack when you saw the price of these cards: You can leave it for a time when graphics card prices relax and buy a processor with internal graphics instead! When will that happen? Well, I guess as soon as crypto mining gets banned!
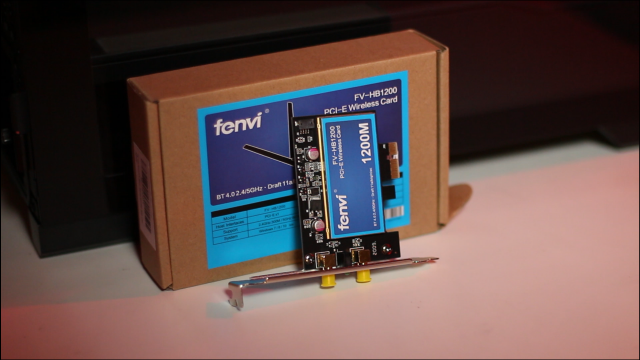
Wifi / Bluetooth
Apple uses very specific wifi and bluetooth chips that are usually not the ones that come on mainboards which have wifi connectivity. To get wifi and bluetooth you’ll need an extension card with a compatible chip. Please check the lists before choosing, because Apple changes this sometimes and a card that ran previously might not be compatible anymore. The card I use and that works really well for me is a Fenvi 1200M. The wifi works as soon as you plug it in, but for the bluetooth you need to have your USB ports mapped correctly for it to work properly. It also works well under Windows and I haven’t had any connectivity issues with it at all.
Mainboard
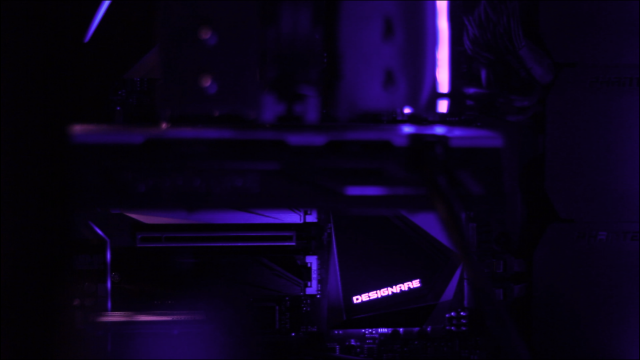
To interface all these components together we still need a mainboard and this is actually the most important part of a Hackintosh build. Unless your mainboard is compatible you’ll find it quite impossible to install Mac OS, so even if you have an old computer with all the right components, you might still have to pick up a new mainboard to make your computer Hackintosh compatible. Luckily there are many different options out there and quite a few are also quite cheap, so depending on which functionality you need on your mainboard this won’t set you back too much. In my case I needed to choose a more expensive mainboard though because I make music and many audio interfaces have work with Thunderbolt. To get proper Thunderbolt support going the best mainboard is the Gigabyte Z390 Designare and this is a really interesting board that also has a good audio chip, relatively fast ethernet and lots of options for fast drives.

It’s also very compatible with Mac OS and it’s considered one of the “golden build” boards which pretty much always lead to a reliable machine. I’m very happy with this board and found it quite easy to install because so many people use it for Hackintoshing. However, if this board is getting a bit too expensive for you I suggest looking into the Gigabyte Aorus series boards. There are different versions and quite a few are commonly used for Hackintosh builds. There are even cheaper options still, but you will have to do your research on the forums to find them!
RGB
Of course none of the RGB is essential in this build! The Mainboard comes with basic RGB and analog RGB strip output like most mainboards these days. Originally I wasn’t planning to put any additional RGB in the case, but then the RGB RAM happened to be cheaper than the regular version for me. And since I already had RGB anyway, I decided to go all out and add some Phanteks Halos digital RGB fan shrouds , because they can be controlled via an Arduino and that seemed like a cool little project!
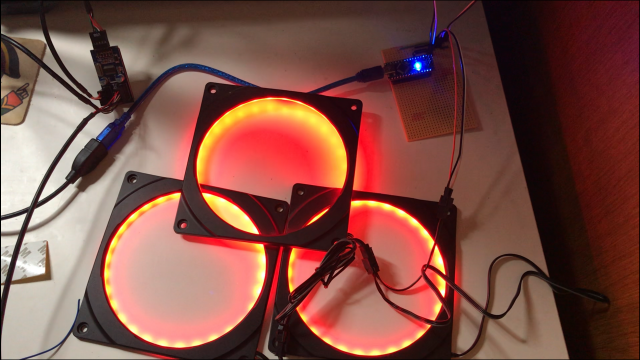
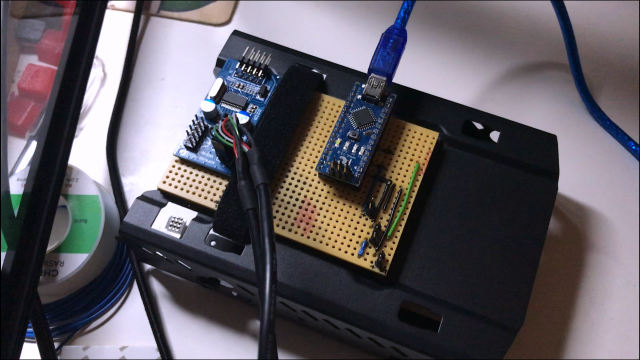
I love RGB Arduino projects, so this was a fun one to figure out. But more about the Arduino controller another time, since it’s really not essential for this build. By the way, there are two versions of these fan shrouds, a digital version that can be controlled via my Arduino controller and an analog version that is compatible with the mainboard connector of my z390 Designare. It might seem unintuitive but it’s actually better to get the ones that aren’t compatible with the mainboard. Why? Well, the problem with RGB and Mac OS is that you pretty much can’t control any of it under Mac OS which is precisely why I coded that Arduino controller to get control over my fan RGB under Mac OS.
You might get very lucky if your mainboard happens to be one of the very few supported by open source RGB control software that is currently being ported to Mac OS, but in my case the mainboard wasn’t compatible and so there is no control for the Mainboard RGB or RAM RGB yet. And this is the case for most motherboards, so generally just assume that you won’t have any RGB control under Mac OS and will have to install Windows at least once, even if it’s just to turn off all the RGB. And yes, you can do that too, the mainboard and RAM usually retain RGB settings. Since we’ve now reached a point where RGB stuff is cheaper than components without it, this might be your best bet! In any case, the only way I could get RGB control via Mac OS was via coding my own Arduino ARGB controller for the Phanteks fan shrouds. It’s better than nothing and this is how I would handle any additional RGB beyond Mainboard and RAM under Mac OS.
RGB Peripherals
Although Apple Mice and Keyboards work just fine under Mac OS, I find them a bit tedious to use under Windows, so I decided to go with a bit more universal peripherals. I went with a wired Dierya DK61E keyboard in black that I modded a little – I gave it o-rings, lubed the switches and changed the keycaps, but more about that another time.
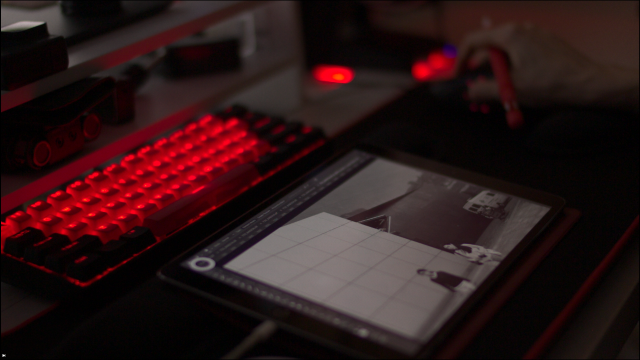
It’s a 60% board which is a bit of an acquired taste, but it works quite well once you get used to not having the arrow keys directly available. I wouldn’t recommend it for old DOS games because you always need to remap stuff to WASD, but apart from that I find it quite comfortable after getting used to it. No problems with it under Mac OS or Windows.

The mouse I use is a Razer Naga Trinity and this one is amazing for photo and video editing, lots of side buttons that can be mapped to different functions in the official Razer Mac OS software, so that’s really cool and I use those buttons all the time in my work. It doesn’t retain RGB settings in general, but the Razer software works under Mac OS Mojave and Windows. And it’s so useful when playing MMOs, which is what it’s actually meant for! I primarily play Lord of the Rings Online with it at the moment.
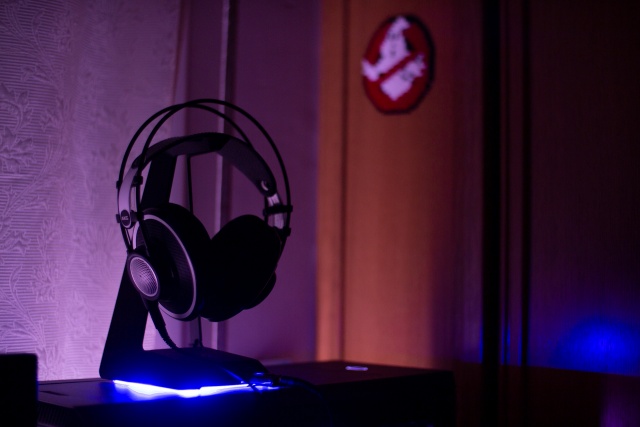
I also have a Razer Basestation Chroma V1 that I use as a USB hub and headphone stand and the RGB can be controlled via an app called Razer Mac OS. When controlled like that it actually retains the settings, which it strangely doesn’t do when controlled via the Razer software under Windows. There is no support for it in the official Razer software for Mac OS. I also can’t guarantee that the new V2 version will work and that one only has 2 USB ports anyway, compared to the 3 ports the older version has. Is it overpriced for what it is? Yes. It does what it’s supposed to do though and I find the USB hub functionality very useful, because the way my Hackintosh sits on the desk means that I can’t easily reach any of the USB ports.
Parts List
To sum it up, here are all the parts I used!
- Intel Core i9 i9900K
- 32GB of 3200 Corsair Vengeance RGB RAM
- Sapphire Pulse RX 580
- Gigabyte Z390 Designare Motherboard
- 1TB Crucial P1 nvme
- Crucial MX 500 SATA SSDs
- 240GB Kingston SATA SSD
- Noctua NH-D15S CPU Cooler
- Fenvi 1200M wifi bluetooth card
- Phanteks P600s
- be quiet! Silent Wings 3
- Phanteks Halos digital RGB fan shrouds
- ELEGOO Arduino Nano clone
Peripherals
These are all affiliate links which you can use to support what I do at no additional cost to you and this way I earn a small commission if you use them. I use all these parts myself and can therefore recommend as working at the time of writing this blog post.
Assembly
Now that we have all the components, how do you actually go about building the computer? Well, I’m not really the person to tell you how to build a PC, since I don’t normally make PC related videos. There are a lot of PC channels out there with great step by step instructions and I’m going to link some here for you to watch.
Before you go off and watch those though, please let me add one word of caution: Many of these channels don’t tell you that you should ground yourself before touching any PC components because you might be statically charged and this can damage electronic components. Please use an antistatic wristband while working on your computer or you might damage something. I actually put it around my ankle so that it doesn’t get in the way, old PC repair trick I learned long ago while repairing computers for a living.
Now assuming you got all the components and followed the instructions in one of those step by step guides you have a PC with all the components connected correctly. What now? How do you actually go ahead and install Mac OS on this thing? Well, that’s a whole other can of worms that will have to wait until the next post, since it’s actually a bit of a lengthy process that needs quite a bit of patience! Stay tuned for the continuation of this little series on how I built my Hackintosh!