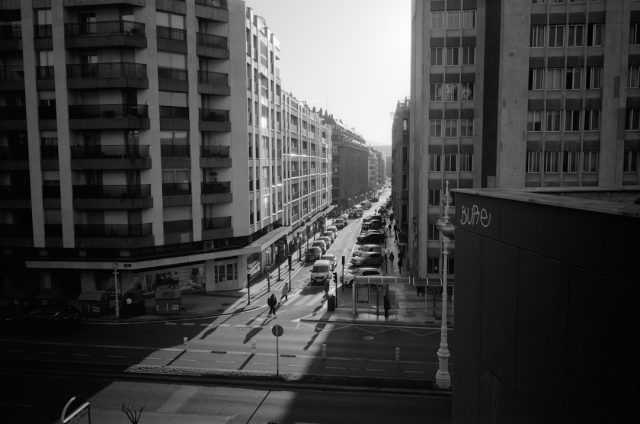
Like many photographers of my generation I started my ventures in the digital realm. I learned the basics on a consumer level Canon DSLR and then moved on to an Olympus MFT camera with Panasonic lenses. The image quality was good, but the whole shooting experience annoyed me. It was too clinical, lacking character and I got infuriated by unreliable autofocus systems. I also felt that it was all too easy. Press a button and shutter priority mode / autofocus would do its thing. Where lies the skill in that? The digital revolution has made us lazy. I wanted to get back to something that had been lost with digital.
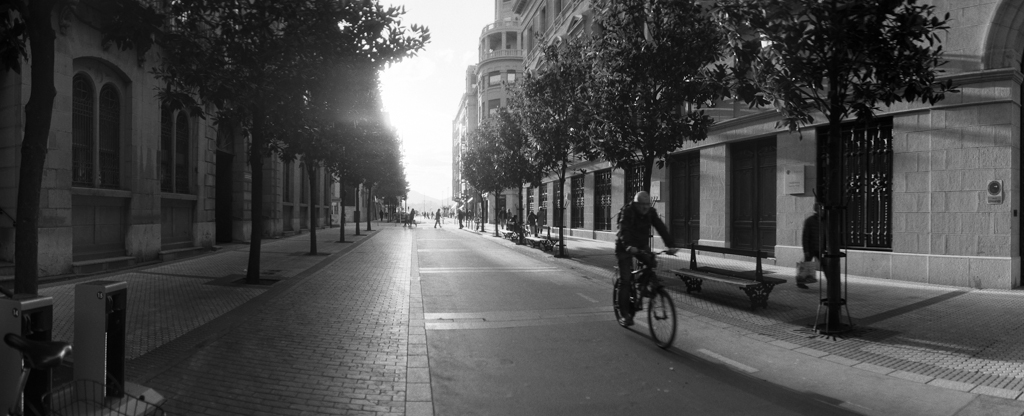
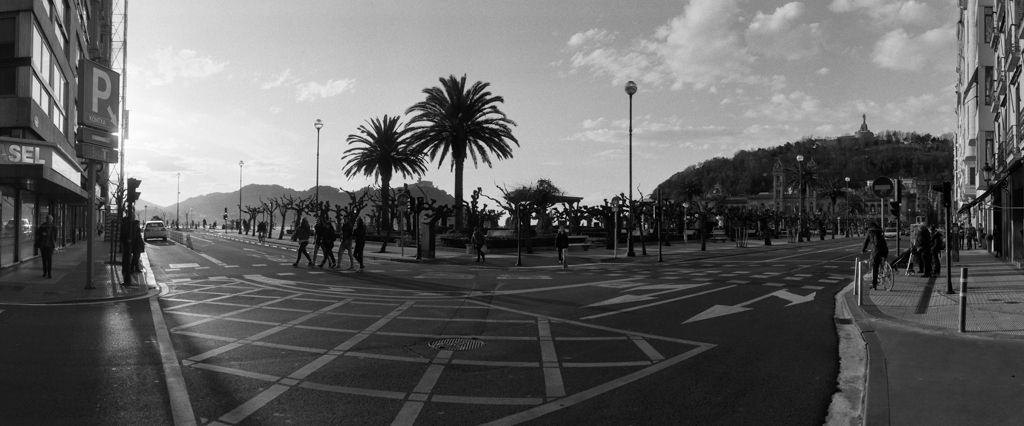
35mm
My ventures into analog photography have primarily been fuelled by a distinct love for the look of pictures taken with a Leica. Since Leicas are very expensive I only wanted to buy one if I could be sure that it would last many many years. Even if digital was my kind of thing I would still find it unreasonable to invest in a digital Leica at the moment when digital is still evolving at a rapid pace. This is why I decided to save for an analog Leica M6 instead.
Although the M6 is much cheaper, it is still quite an investment. Therefore I set myself certain requirements to be able to really appreciate my investment from the very first day:
1. Getting the hang of using a fully manual rangefinder camera for street photography.
2. Being able to develop my own film and make contact prints at home.
3. Getting by without a light meter.
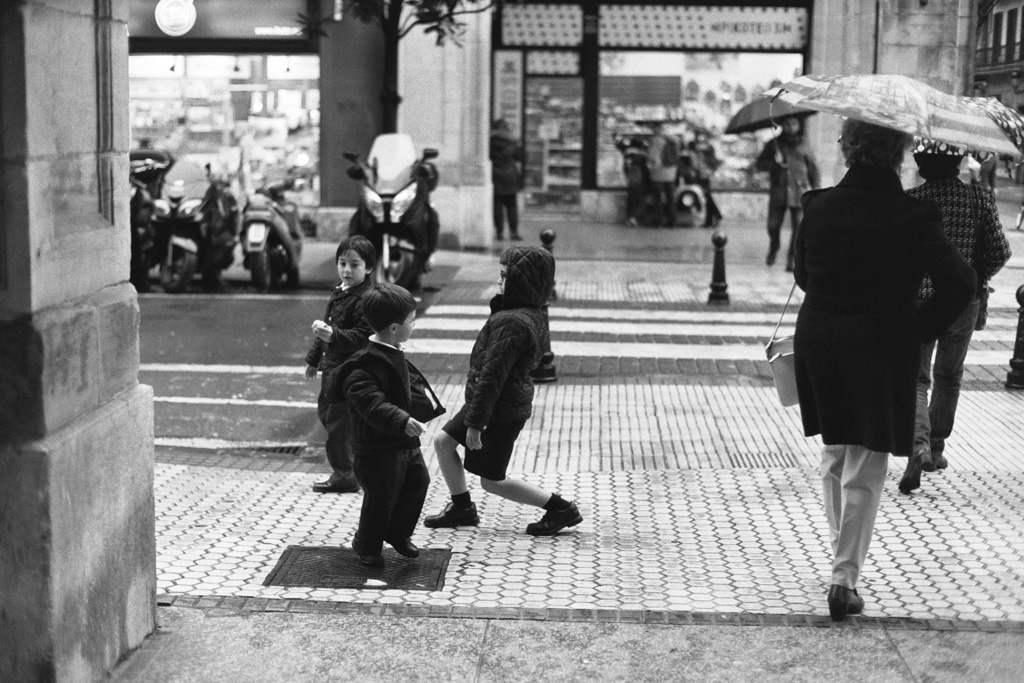
For the first step I decided to get the Zorki 3C with a Jupiter 8 50mm f/2.0 lens. This rangefinder camera from 1956 is a soviet Leica copy and therefore the closest I could hope to get to the real thing. With this camera I learned how to focus with a rangefinder and how to use an external light meter. The next step was to learn to develop my own film, which is actually surprisingly easy. At the moment I mostly develop my film in HC-110, Rodinal 1:100 or in Caffenol-CL. I also started to develop my own C41 film in 2014, which is actually easier than everyone suspects. The last step was to lose the photometer and learn to guesstimate according to the sunny 16 rule. Although the M6 has a light meter I shoot a lot from the hip, so knowing roughly how to guesstimate the light means that I have to meter less in between shots. The original plan was to shoot at least 30 rolls of film with my Zorki – 1000 frames – to really get the hang of it. I wanted to reach a point where I can know how to expose and develop the film so that I get predictable results in different lighting conditions.
© Lilly Schwartz 2013
© Lilly Schwartz 2014
My favourite focal length is around 35mm, so after setting myself a goal of 30 rolls of film I also decided to get the Jupiter 12 35mm f/2.8 lens to have a bit more fun. By chance the lens happened to be bundled with a Zorki 4K from 1975, which has a film advance lever instead of a dial. The lever is much more comfortable than the dial and the combination of the Zorki 4K and the Jupiter 12 35mm f/2.8 lens soon became my favourite analog gear. The lens also easily outperforms the 50mm Jupiter 8 in sharpness and contrast as well, so this was a great change of gear. The quality of these old soviet lenses is notoriously unpredictable by the way and seems to depend highly on the size of the vodka ration of the factory workers on the day the lens was produced. I’ve seen some great results from the Jupiter 8 50mm online, but mine produces a distinctly old look with a certain softness and low contrast. My 35mm Jupiter 12 on the other hand produces great image quality when it’s stopped down. I shot more than 60 rolls with my Zorki and still felt my film development needed tweaking before I could move on to a Leica.
© Lilly Schwartz 2013

© Lilly Schwartz 2014
Although I like shooting with fully manual cameras, they can be a little problematic when I’m on the go and don’t have much time to set the correct exposure. I also found it difficult to hone my film development skills with the unpredictable exposures I got when working without a light meter. Then one day I found a little aperture-priority Olympus XA, F.Zuiko 35mm f/2.8, in a small camera shop in Berlin for a very reasonable price and couldn’t really pass it up, although I wasn’t even planning to buy a camera. It was actually precisely the camera I needed at the time. It is very small and light – both smaller and lighter than even my digital Olympus – and has a decent lens despite the odd design. It’s a little soft and has a bit of glow wide open, but it’s quite alright stopped down. Although it only has aperture priority and looks like a pretty standard point and shoot, it actually has a rangefinder and performs well enough even in low light. For about half a year this was my main 35mm camera and I continue to be amazed about the ease of use and the relatively good image quality. We also went through around 60 rolls together.
© Lilly Schwartz 2014
© Lilly Schwartz 2014
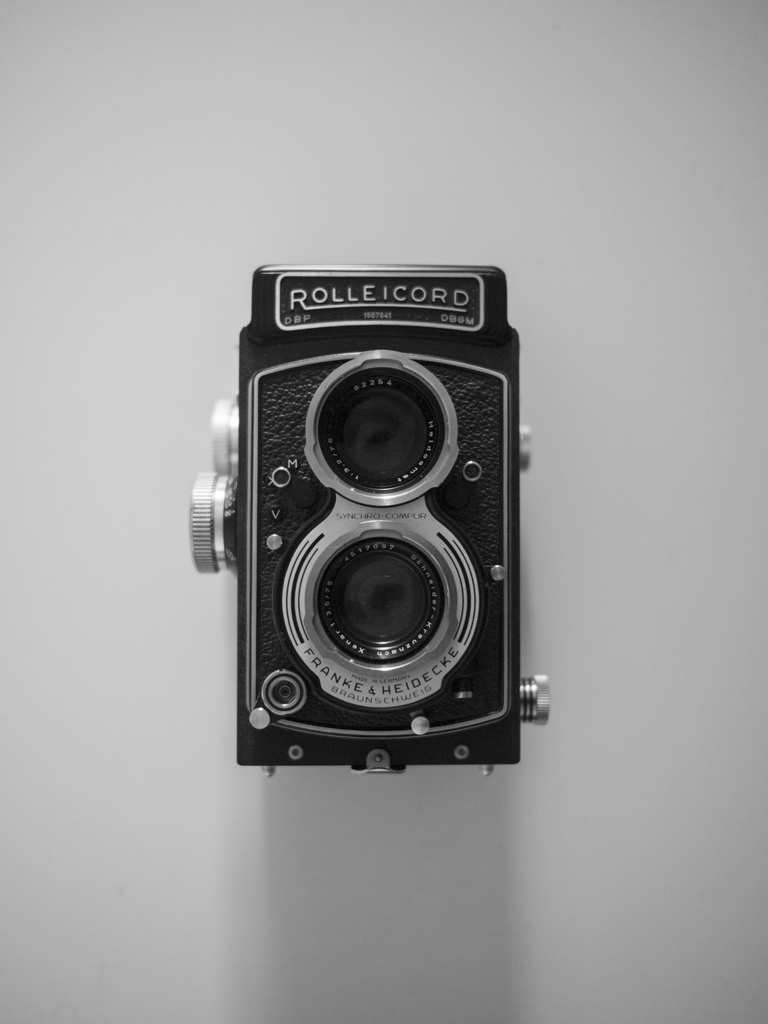
Medium format
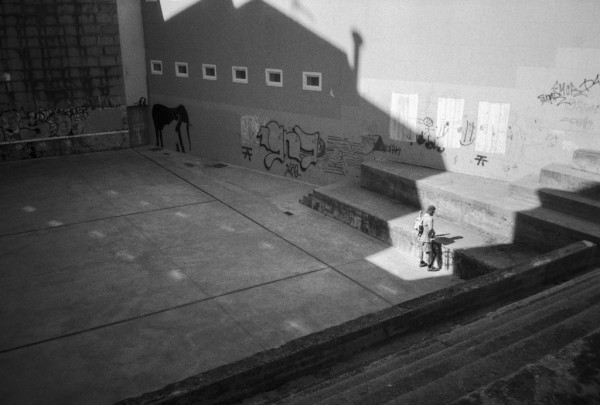
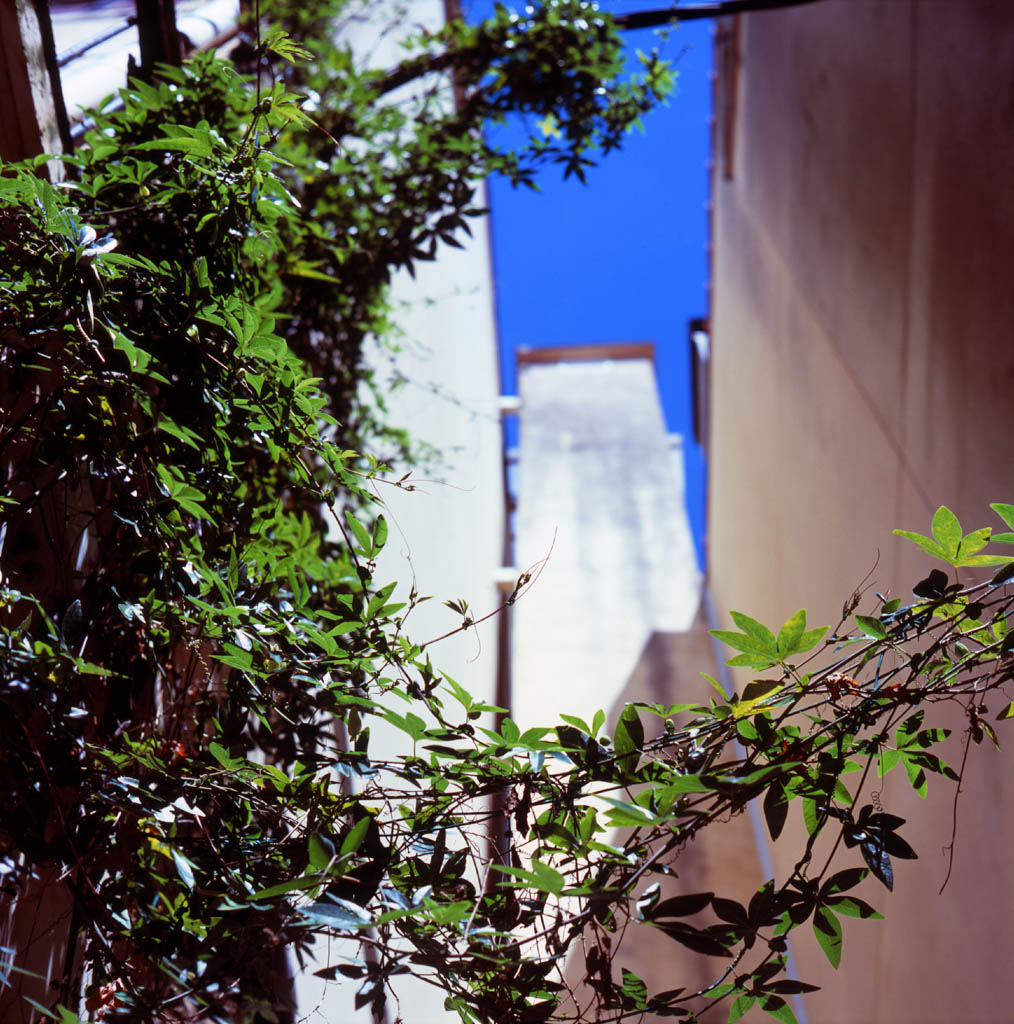
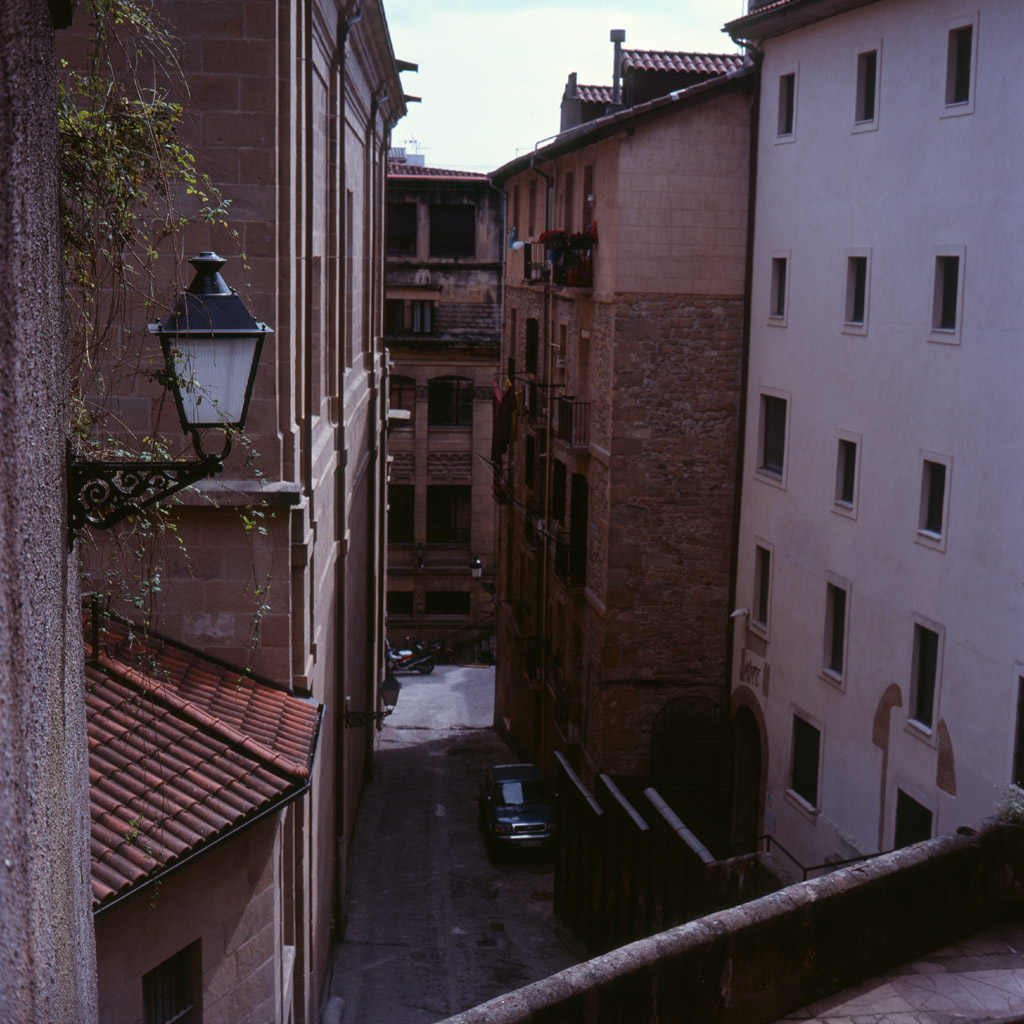
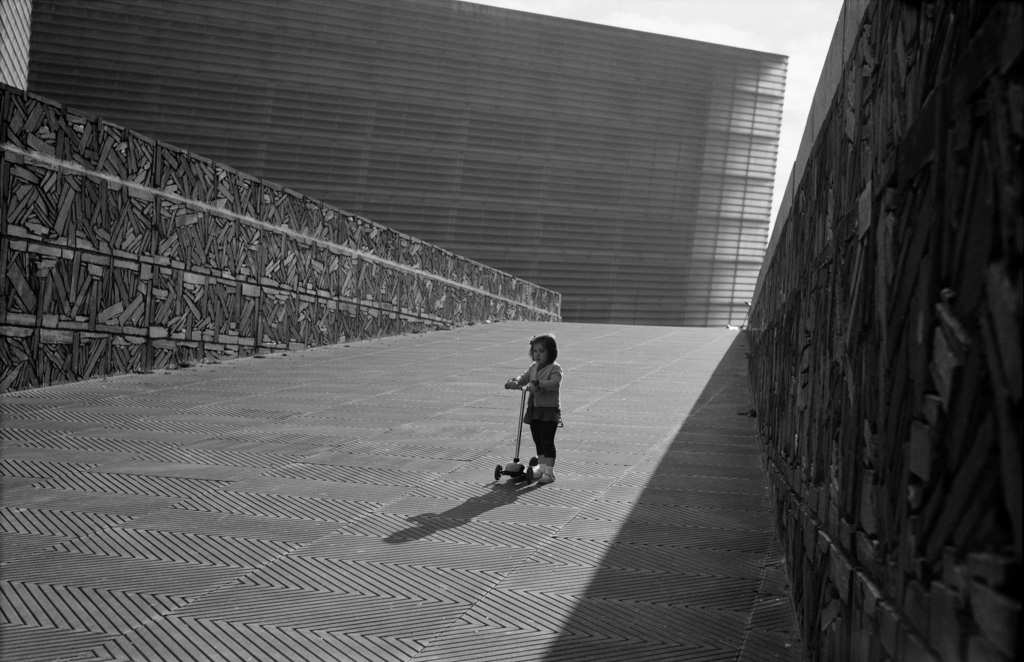
After trying out a medium format camera that I had on loan for a little while I was simply amazed by the quality of the pictures and the size of the negatives that allow for massive print sizes. Although the price of the film is rather prohibitive and there are only 12 6×6 shots on one roll of 120 film, the quality is so amazing that I invested in a Rolleicord V with a Schneider-Kreuznach Xenar 75mm f/3.5 to shoot more street in this great format. Rolleis always were the best TLR cameras out there and I was in love since the first time I saw a Diane Arbus print shot with a Wide Rolleiflex. I was actually already decided on a Rolleiflex 3.5F when I found my mint condition Rolleicord V in the same small camera shop in Berlin. Although the Xenotar and Planar lenses on the Rolleiflex are slightly sharper wide open than the Xenar on my Rolleicord, this difference becomes really unnoticeable when shooting street at f/8 – f/16. With a brighter focussing screen it even does a great job at f/3.5. Also, the Rolleicord is actually considerably lighter and costs considerably less, which does make a big difference when shooting street. Rollei and Leica play in the same league, so the Rollei was my first investment into a “proper” film camera and I have not regretted it at all. The image quality is amazing and the camera is just beautiful. It might even be my favourite camera, because the reactions of people are so different and positive when I’m shooting with it.
Rollinda | © Lilly Schwartz 2014
© Lilly Schwartz 2016

© Lilly Schwartz 2016
© Lilly Schwartz 2015
© Lilly Schwartz 2015
And finally, a dream come true
After more than 150 rolls of film in 35mm and medium format I decided to take the next step. I had developed almost all of these rolls myself in different developers, I made a few prints in the darkroom, winged some contact sheets with the bathroom light and finally felt that I was ready for the real deal. Yes, at the end of 2014 I finally made my Leica dream come true and got myself the Leica M6 that I’ve been lusting after for quite some time! Her name is Nancy and I have given her a lovely Zeiss lens, the Zeiss ZM C-Biogon 35mm f/2.8, for a companion. The Zeiss lens actually surpassed my expectations and is just wonderful. Originally I had wanted to exchange it for a 35mm Summicron IV later, but the Zeiss is such a stellar lens that I will keep it as my main lens.
Now was the wait worth it? Totally! Shooting the M6 is an experience. The haptic feedback of the film forwarding lever, the shutter sound, the bright and clear viewfinder which you can still focus in very dark conditions, the smooth focus of the Zeiss lens, the click stops at a third of a stop. It all adds up to the nicest camera I have ever used.
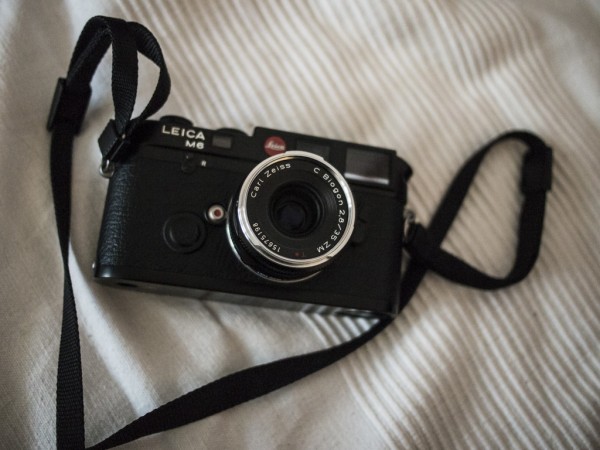
Nancy | © Lilly Schwartz 2014
© Lilly Schwartz 2014
© Lilly Schwartz 2015
© Lilly Schwartz 2015
© Lilly Schwartz 2015
© Lilly Schwartz 2015
In 2015 I used Nancy as my main camera shooting roughly 200 rolls. I also shot more than 40 rolls with the Rolleicord in that time. Both cameras were great investments and have surpassed my expectations. 2016 brought more Leica and Rollei love and at the beginning of the year I also invested in a Voigtländer Nokton 50mm f/1.1 which proved to be a wonderful lens too. This lens is a particularly quirky one, since its extremely wide aperture gives it some rather strange characteristics. Wide open it has a distinct glow, not an awful lot of sharpness in the corners, but already stopped down to f/1.4 it starts to perform admirably. Wide open it is a rather dreamy lens and I love how distinctly different the look is. Of course, if you are looking for clinical sharpness wide open, this is not the lens to get, but what is the alternative? The extremely expensive Noctilux lenses? For the price it is an excellent fast lens and I am very happy that I bought it. It also forced me to shoot from eye-level, which has changed the way I approach my subject matter when I’m shooting with this lens. I actually bought this lens for shooting at night, but to my surprise I actually very much enjoyed shooting it during the day with low ISO film. The only downside is that it’s really a rather heavy lens. I’m unlikely to carry it when I also have the Rolleicord in the bag.
© Lilly Schwartz 2016
© Lilly Schwartz 2016
© Lilly Schwartz 2016
Although the 50mm Nokton was already a great choice for low light shooting it has a very distinctive look that doesn’t work in all situations. The softness and glow wide open just didn’t fit the style of a project I had already begun with my Zeiss lens, which is why I decided to also get the Voigtländer Nokton 35mm f/1.2 for situations where I needed a cleaner look and more speed. It’s truly a superb lens and the rendering is totally different from the 50mm Nokton. It’s sharp and smooth wide open and it’s also super fast, which are all characteristics that quickly turned it into my favourite lens for the winter. The size and weight of it is substantial, but its flexibility makes up for the additional weight easily.
© Lilly Schwartz 2016
© Lilly Schwartz 2016
By now I have settled on the Zeiss ZM C-Biogon 35mm f/2.8 as my regular lens in summer, the Voigtländer Nokton 35mm f/1.2 for the winter and the Voigtländer Nokton 50mm f/1.1 for projects and shooting low ISO film during the day.
Gear for projects and experiments
Also along for the ride during 2016 was my excellent Mamiya C220 with a Mamiya Sekor 80mm f/2.8 S lens that my good friend Julia has given to me. Thank you Julia! I’m still having some trouble integrating this wonderful camera into my workflow, because it is so big, but I’m already planning different projects with it in the future. The Mamiya is another TLR camera like the Rollei, but it actually has interchangeable lenses, which makes it a lot more flexible. Remember that Diane Arbus shot taken with a wide-angle Rolleiflex? There are wide angle lenses for this camera, which would make it possible to get similarly interesting results with it once I gain the confidence to point such a huge camera at strangers.
© Lilly Schwartz 2015
© Lilly Schwartz 2015
Although I have already found my favourite gear for shooting street I’m always experimenting with different formats for other work. In 2016 I was shooting a part of my project escape velocity for which I felt the need for the quality of medium format, but also wanted a different aspect ratio than 6×6. I felt tempted by the 6×7 format, but couldn’t yet find any affordable cameras in that format. In the end I decided to go with 6×9 and found a wonderful Zeiss Super Ikonta 530/2, a folding camera from 1937. Although somewhat difficult to use at times, the image quality of this grandpa of a camera is simply astounding and I managed to get exactly the pictures I wanted from it for the project I was shooting.

© Lilly Schwartz 2016
© Lilly Schwartz 2016
In 2017 I also finally made the jump into a format that really has very little use in my favourite genre of street photography: 4×5. I have been thinking about this format for years and how to integrate it into my regular workflow. For a while I was hoping that I could get a Travelwide camera and simply shoot street with it. It would be a real challenge and that appealed to me. Sadly this camera never materialised as a sustainable product and finally I decided that I had to think about the format differently. Instead of trying to get a camera for a specific purpose in my typical goal oriented fashion I felt that I should just get a proper 4×5 with a range of movements and let myself experiment with all the new and wonderful things this would open up for me. I still wanted the camera to be portable, so I decided to get a press camera, but I also wanted to use barrel lenses, which would give me more flexibility: In the end I decided on a Pacemaker Speed Graphic from the 1950s. This is certainly a camera that is very far outside my comfort zone, but it will be one of these long-term adventures that will hopefully create many new opportunities for me. I was similarly apprehensive when I started experimenting with colour in my photography, because it was just so different from what I had done before. It indeed took me years to master, but by now I have successfully integrated it into my workflow. I’m sure 4×5 will work out in much the same way for me.
Graflex Speed Graphic + Leitz Hektor 150mm f/2.5 | © Lilly Schwartz 2018
In this spirit of experimentation I have also been testing toy cameras like the Holga and the Diana F+. The main reason for trying them out was to convert them to pinhole cameras – the Diana F+ even comes with an integrated pinhole aperture – but once I shot some test rolls I was surprised to notice that their quirky optics appealed to me somehow. Not for my regular street work of course, but I could imagine myself using this aesthetic for other projects. Although I still have no idea what I’m ultimately going to do with these formats and techniques I’m fascinated by the possibility of converting and possibly building my own cameras and lenses too, especially when it makes otherwise very expensive formats affordable – for example 6×17 panoramic cameras. Panoramic could work well for street photography, which is why I’ve been playing with a Russian Horizon 202 to get a feel for the format. The Horizon is a swinging lens panoramic with a bubble level in the finder. Although it has a surprisingly sharp lens, it tends to be a challenging camera to use because it is so susceptible to internal reflections and needs to be held perfectly level to prevent distortion. So, in some way it falls in the toy camera spectrum too, but not quite as much since the image quality is actually quite good.

Horizon 202 | © Lilly Schwartz 2017
Horizon 202 | © Lilly Schwartz 2017
Horizon 202 | © Lilly Schwartz 2017
Horizon 202 | © Lilly Schwartz 2018
In 2019 I added another camera to my arsenal to have a bit of a lighter alternative to the Speed Graphic to carry up the mountain for landscape photography. This “lighter alternative” was a Mamiya Universal Press which is one of the cheaper options for shooting 6×7. This aspect ratio is somewhat similar to the 4×5 aspect ratio so I thought it would be a good option for scouting locations before taking the Speed Graphic for the final picture. The funny part here is that the Mamiya Universal is really quite heavy too, it just doesn’t need a tripod and the lenses aren’t quite as heavy. It’s a really flexible camera too and can shoot many different formats, 645, 6×6, 6×7, 6×9, polaroid through interchangeable film backs. And since it is modular, it’s in part also compatible with the Mamiya Super 23 which meant that a second body for the system was available. The Mamiya Super 23 is practically the same camera, but slightly less flexible because it has rear movements and therefore restricts some uses, but allows others that aren’t really available on any of my other cameras – the Speed Graphic has front movements, but a fixed rear standard, so getting rear movements on the Super 23 was really exciting. On the whole it’s a really cool and interesting system with many different options. Sadly because of the pandemic I haven’t yet had much opportunity to play with it.
Mamiya Universal with 6×7 back | © Lilly Schwartz 2020
Mamiya Universal with 6×9 back| © Lilly Schwartz 2020
Gear quality
Is excellent gear really necessary to take good pictures? Well, yes and no. Without wanting to brag, I have taken some rather good pictures even with cheap cameras like the Zorki, the Olympus XA and medium format folding cameras. However, a lot of frustration has gone into these pictures too. The Zorki for example tears film, especially in cold weather, the shutter is sticky and unreliable, and finally the Jupiter 12 lens is not sharp from corner to corner even at f/5.6. Frankly, it’s also a pain to use! Changing the shutter speeds is fiddly and the Jupiter 12 has the aperture ring at the front without any stops. Also the medium format folders are difficult to handle, occasionally tricking me into winding on without taking the shot and especially the zone focus of the 6×6 folder was impossible for some lighting situations, even more so since the scale was completely off. Many of the pictures I have taken with the Rolleicord would have been quite undoable with a folding camera with zone focus. Apart from the pretty invisible rangefinder patch the XA is a fine camera where it comes to handling, but even stopped down the lens is just not that sharp due to the weird design. In general when putting a 20x30cm print from the Zorki or the XA next to a print from the Leica it feels like you’re going a little blind. If you’ve never shot any really good lenses, you obviously won’t notice the difference. However, there definitely is a reason why the XA or a Zorki could be had for less than the value of a Leica camera case when I bought them! Yes, I can take decent pictures with just about any camera, but not in all lighting conditions, not without swearing and quite likely even 20x30cm prints won’t look all that sharp. No, I don’t need great cameras to take decent pictures, but they really help!
To me one thing is clear after years of shooting excellent gear: There is no way back into cheapo land, at least not for my street and documentary work. There is joy in imperfections in other genres and I have been exploring this more and more over the last few years, but for some genres sharp lenses and cameras that are convenient to use are a must for me.
Processing and Scanning
Since I obviously shoot quite a lot of film now – 315 rolls in 2016 – I was getting more and more behind on development and scanning. It was time to make my life a little easier and I decided to automate my film development. For colour development and even most of my BW I now use a Jobo CPE-2 rotary processor and I also built a robot to help me with my small tank processing in black and white.
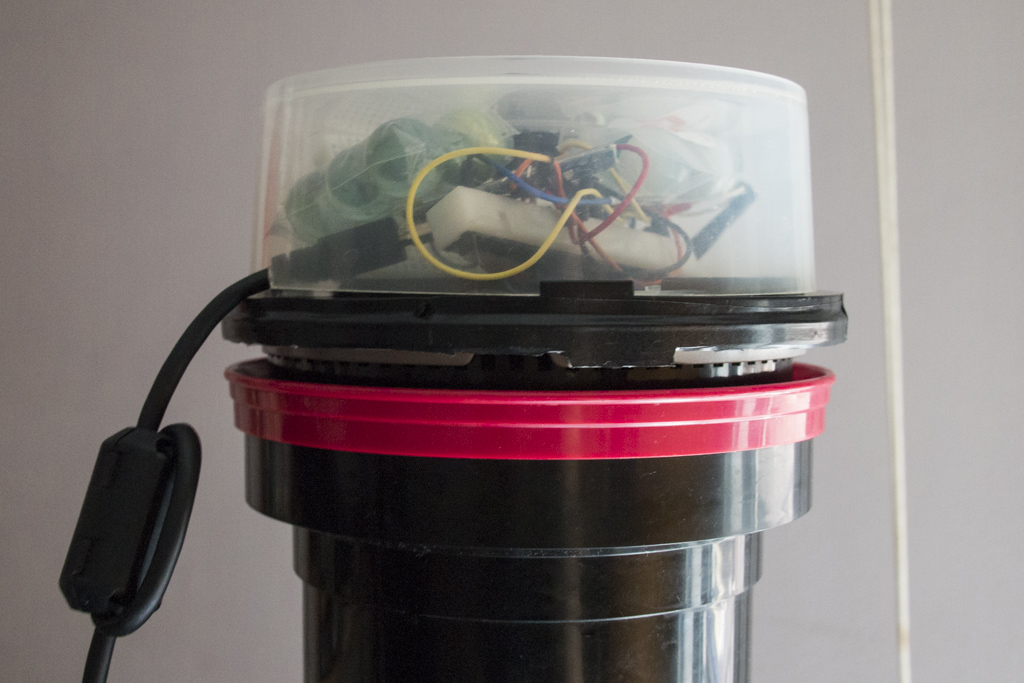
DIY arduino agitation robot | © Lilly Schwartz 2015
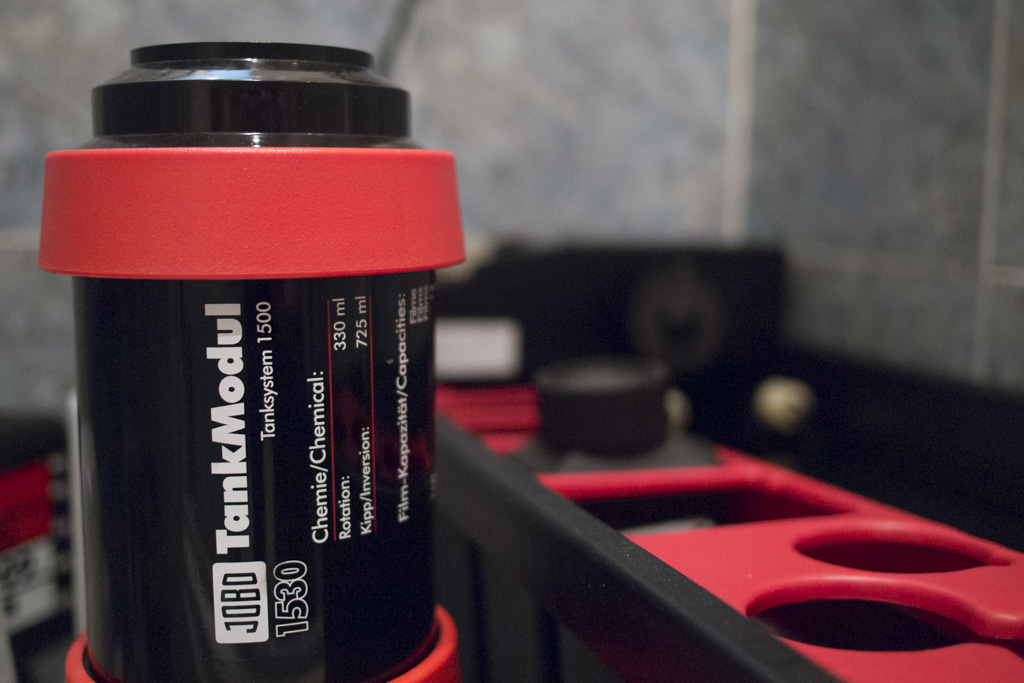
Jobo CPE-2 | © Lilly Schwartz 2015
I also optimised my scanning process and got myself a Pakon F135 plus. This scanner scans a roll of 35mm film in 3-5 minutes and does an amazing job at colour correcting consumer films. The Pakon is actually a lab scanner which used to be very expensive, but since it was discontinued a few years ago the price dropped considerably for a while and I managed to get one before prices went up again. Of course this guy also needed a name and he was christened Paco – or Francisco if he isn’t behaving. The Pakon works especially well with emulsions like Kodak Gold or Fuji Superia, which means that I’ve been shooting a lot of cheap consumer films lately.
For medium and large format as well as high resolution scans I use an Epson Perfection v700. It’s a real beast and very slow when it comes to 35mm, but for medium format and 4×5 it works very well. For black and white I usually scan in Silverfast, but I use VueScan and ColorPerfect for colour scans.
Darkroom
At the beginning of 2016 I also started to do darkroom work at home. I use a Durst M670 VC, which is a black and white multigrade diffusion enlarger, with a Nikkor 50mm f/2.8 lens for 35mm work and a Schneider-Kreuznach Componon-S 100mm f/5.6 lens for medium format. You know, that magical moment when the picture appears on the paper in the developer? It’s as good as everyone says!
In 2019 I also finally finished another DIY darkroom project, my wifi Arduino Fstop timer and RGB LED enlarger light source for which I 3D printed a new enlarger head for my Durst enlarger. What does it do? Well, it automates many of the calculations used in f-stop printing and therefore makes getting predictable results in the darkroom a lot easier.
Finished DIY WiFi Arduino darkroom timer and RGB LED light source
This project was also a preliminary for a 4×5 enlarger that I will hopefully finish soon too, based on the same design but with a 4×5 camera as the enlarger head. This will probably happen in a new darkroom space though, since my temporary setup makes long printing sessions rather uncomfortable.
Video gear
At the end of 2018 I started a YouTube channel to document all my projects. This shifted my camera requirements a bit and I suddenly needed digital cameras again. Since this is not gear I ever use for photography, I didn’t really want to spend much money on it, which probably explains some of my choices. My A cam is currently my husband’s old Canon EOS 700D which I use primarily with a manual Sigma 24mm f/2.8 with a Pentax K mount. It’s the perfect focal length for the APS-C sensor – roughly works out as 35mm – and it has a nice vintage feel. The Canon is old and can only shoot 1080p in 25 fps with a limited range of lenses, so it’s not ideal, but for a simple talking head shot it’s all I need. If you see me talking to the camera in the studio, that’s the camera and lens combination I tend to use. My B cam is a second hand Canon EOS M that I bought because it can shoot 14bit 1080p raw with Magic Lantern. Most of my b-roll is shot in raw on the EOS M now. It’s a fairly quirky and not very convenient setup without any image stabilisation, but it can take all my vintage lenses including my Leica M mount lenses and even some weird C-mount lenses due to the possibility to crop into the frame quite drastically at high resolutions like 2.8K. With the raw capabilities and all my nice lenses I can get really pretty footage with it and I quite enjoy using it, even though it’s not a very convenient setup. For my point of view videos I’m usually far too focused on taking pictures though, so I don’t bother with the complicated workflow that the Canon EOS M implies. I just put a GoPro Hero 7 Black on a cold shoe mount and leave the GoPro running while I take pictures. I shoot in ProTune in 1080p because the GoPro overheats otherwise. Again, not ideal, but at least the shooting part is convenient. The editing part, not so much, because I have to sift through hours of footage and correct the horizon on pretty much every single clip, because the wide angle exaggerates even the slightest tilt to the camera.
Lights
I never bothered much with artificial lighting before I got into video, because natural light is all you find in street and landscape photography anyway. For the videos I had to get a couple lights to make filming indoors feasible. Currently I use a FalconEyes SO-28TD soft light with an additional diffuser as my key light and a janky ring light setup with a light tent draped over it as a fill. I use this combination mostly for space reasons, because there simply isn’t room for a big soft box or other modifiers in my studio. Most of my practicals are cheap Chinese RBG LED lamps that can be controlled via an app. They are fun, but I have to be careful with frame rates when using the practicals.
As you can see, my video setup is definitely a “budget rig”, but it works for what I do on YouTube. If I had commercial concerns or had to use these digital cameras for photography, these would definitely not be my first choice. I prefer to spend my money on film cameras though because they are a much more sensible financial investment. Film cameras keep their value and don’t break / become obsolete quickly, so they make much more sense for me than any new digital camera with fancy video functions would. YouTube is becoming more and more important in what I do though, so this might change eventually?
Video editing
After trying Premiere Pro and not enjoying it much I used an iPad app called LumaFusion to edit all my videos for about a year. It’s a bit glitchy for large projects, but it’s excellent for shorter videos and can do almost everything you might want it to do at a very reasonable price. Definitely a cheaper option if you don’t want to build a dedicated video editing computer. After my old laptop died I decided to build a Hackintosh though, specifically with video editing and music production in mind. Since then I use DaVinci Resolve for pretty much all my videos. I sometimes still start edits on my iPad, but then always finish them off in Resolve. I definitely do the colour correction, effects and audio in Resolve, because it’s just so much more powerful. Best of all: Most functionality is available in the free version! If you want to get into video editing, definitely check out DaVinci Resolve. And nope, they don’t sponsor me for writing this!
wish list
There are a few items on my gear wish list that are still out of reach to me for now.
- Black Magic Pocket Cinema Camera 4K as my video A cam. And yes, I’d happily collab with Blackmagic Design on this, since I’m such a big fan of DaVinci Resolve anyway!
- Zeiss Biogon 25mm f/2.8 for the Leica
- Aero Ektar lens for the Speed Graphic
- Mamiya 65mm lens for the Mamiya C220
- Mamiya 50mm lens for the Mamiya Universal Press
- Mamiya 7 – a girl can dream, right?
- GoPro Hero 10 with automatic horizon levelling 😅
In general, since I always like to experiment, gear donations are always welcome, even if it’s not on the list or slightly broken. If you have anything you don’t need, contact me.