A lot of people feel rather intimidated by doing their own film development at home. I definitely understand it, I was worried myself and didn’t dare to try it myself until after someone else showed me how it works. The thing is, it’s actually quite easy and the most difficult part is to overcome the fear of trying something new. To make it a little easier for you I thought I’d write a little guide, to show you that it’s not as difficult as you think and that you definitely don’t need a proper darkroom for it either.
Why stand-development?
The method of development I will show you here, stand-development in Rodinal, is by far the slowest, but also the easiest, laziest and cheapest method of developing black and white film. It will give you quick results and there is no need to measure temperatures or to be very precise with the timing or your agitations, which makes it much easier than normal development. Also, most films of any ISO have roughly the same developing times, which means that you can develop rolls of different speeds and types in one tank. At the same time the development method is compensating, which means that it slightly reduces contrast, but at the same time it doesn’t really matter if you underexpose or overexpose by 1 stop. This is great when you’re guessing exposures with the sunny 16 rule or you could actually change ISO settings by one stop halfway through the roll. Sounds all very easy and positive? Well, this doesn’t mean that this method doesn’t have problems, but it is definitely very easy to learn, produces decent results with most films and is definitely amazing for pushing film. And the best thing is, you don’t even have to sit next to it. You start the development, and then leave it to stand, so that you can actually just go do other stuff while the developer is doing its magic on its own.

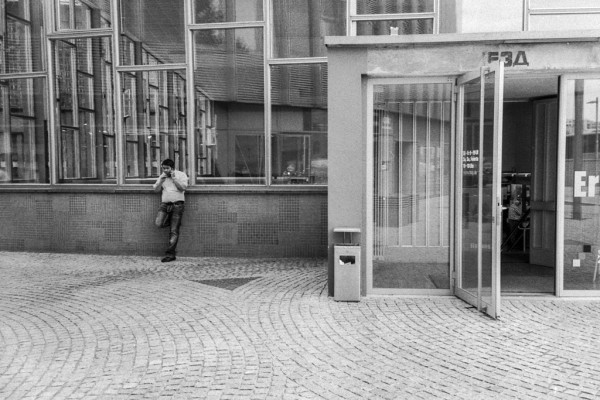
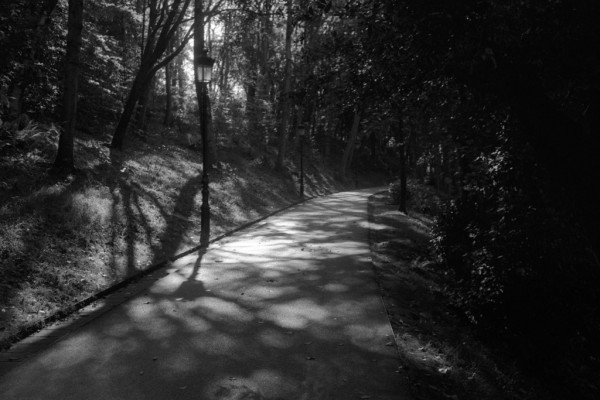
Rolleicord V, RPX 400, Rodinal 1:100, 70min | © Lilly Schwartz 2014
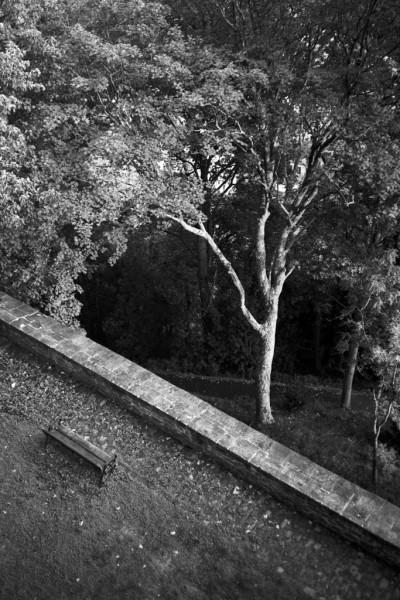
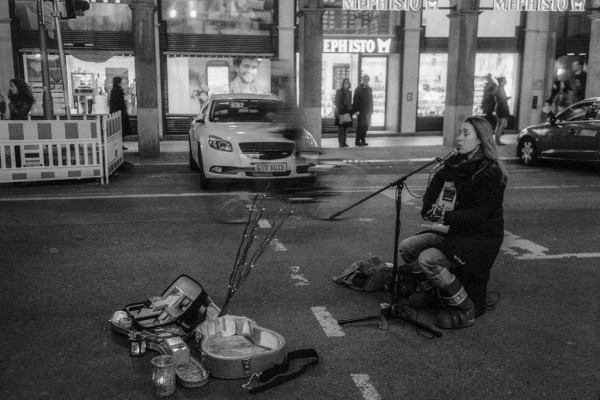
Zorki 4K, Fuji Neopan, Rodinal 1:100, 60min | © Lilly Schwartz 2013
What you need
There are a few things you will need to get started. It’s not a lot of stuff though and you can pick these things up cheaply on the internet. I paid roughly 60€ for the whole lot of it including the chemicals. Changing bags aren’t cheap, but if you have a room that can be made completely dark, you won’t need one.
- Developing tank.
- A room that can be made completely dark or a changing bag.
- Several measuring cups of 1L: I use 3, but you can get away with 2 or even 1.
- Measuring device for small amount of liquids: You need to measure 3.5ml, so a 10ml plastic syringe from the pharmacy should do.
- Chemicals (Developer, Fixer, wetting agent) and maybe some distilled water depending on your water quality.
- Ideally running water, but you can also use water from a bucket as a replacement.
- Enough ventilation, ideally in a room with a window.
- A place to hang your negatives.
- Some film clips or clothes pegs.
- Scissors.
- Bottle opener or film leader retriever.
- Protective gloves.
- A timer on which you can see the seconds.
- An exposed roll of black and white film of any ISO speed and type.
Now, let’s look at the most important stuff in detail to make sure we get it right:
Developing tank:
There are different types of tanks that come in different materials and have advantages or disadvantages. The most common option are plastic tanks with plastic spools. They are cheaper, but less durable and they don’t respond quickly to temperature changes. Also, and that’s probably the most annoying part: The plastic spools have to be completely dry when you load the film or else you won’t get the film onto the spool. Among the plastic tanks there are also variations in price. The most expensive are Jobo tanks. They use less liquid, which makes the chemicals a little cheaper in normal development, but isn’t good for stand-development, because the latter uses weak dilutions that need more liquid. However, these tanks can be inverted without dripping, which definitely helps when dealing with toxic chemicals, and there are also some series that can be extended to take more spools at once. These are definitely good tanks, but another thing I found annoying with my old Jobo tank was the spools, because they are quite fiddly to load. It often took me 2 or 3 attempts before I could get the film on the spool. The cheaper Paterson and AP tanks have better spools, but they are not extendable and at least the AP tank bleeds like a stuck pig.
The alternative to plastic tanks are metal tanks. They are definitely more durable and might actually last you for a lifetime, which makes them in effect cheaper in the long run, although they are quite expensive in the short term. Metal tanks tend to have metal spools that can be loaded wet, but are apparently a bit more difficult to load in general. So, these tanks definitely have some advantages, but on the other hand you should only get one of these if you’re really sure that you’re going to be developing a lot of film for quite a while, or it’s not a sensible investment.
Although any developing tank will do, my recommendation is to get whatever tank feels right for you. If the tank needs to be cheap that’s fine too: I myself actually use a 2 spool AP tank, because it was the cheapest out there and it also has enough space for stand-development, which is what we’re doing here. A Paterson tank will work equally well and if you want to invest in a Jobo or metal tank, that’s a great choice too. However, for the Jobo tank I suggest that you get a bigger or extendable tank, because in a Jobo 2 spool tank you should only develop 1 roll of film with stand-development. It is definitely more efficient to develop more than one roll though, especially in stand-development where every batch takes more than an hour to develop.
Chemicals:
You will need three types of chemicals, and maybe you can get away with two if you have wonderful soft water where you live. The first one is the developer that as the name says develops the image on the film. The second one, the Fixer is the one that makes the picture permanent instead of letting it fade away again. The wetting agent is basically a help for drying the film so that you don’t get water stains on your negatives.
1. Developer
In black and white development the choice of developer is just as important as the film you shoot. For normal development you can get powder developers, liquid or syrup developers or mix your own from base chemicals. Powder developers like D76 or Xtol are more difficult to mix and temperate, because you need to use them in 1:1 or stock dilution, liquid developers like HC110 or Tetenal Ultrafin are difficult in other ways because they can have very strange dilutions to confuse you and don’t even get me started on mixing your own! All these choices can be really difficult to make and especially in the beginning it’s all a little overwhelming. With stand-development however things get very easy: There are really only three common developers for this type of development, Rodinal, HC-110 and Caffenol-CL. I myself use both Rodinal and Caffenol for stand-development, but have yet to try HC-110. Which of these you want to choose depends very much on the film you want to develop and how difficult you want to make things for yourself. I recommend that for your first experiment you stick with Rodinal, because it is cheaper and you can get it in smaller bottles. In some places you can even get only 100ml for 4€, which is perfect for trying it out. However, keep in mind that not every film works well with every developer. Rodinal works well for me when I develop Kentmere 400 / RPX400, HP5+ or Acros, but I often have problems with Tri-X at box-speed. So, if you mainly shoot Tri-X I recommend that you get HC-110 instead. Caffenol-CL is generally a really great developer, but it’s a little more fiddly, because you need to mix it yourself from instant coffee, vitamin C, washing soda and potassium bromide, so maybe try that a little later when you’re more confident about your development chops. One more thing: Rodinal is one of these developers that is really quite toxic and in fact it is even corrosive. For this reason it can’t be transported by plane and might be difficult to obtain. If you can’t find Rodinal anywhere, then I suggest you go with HC-110 instead.
2. Fixer
Any type of fixer for film will do. However, I recommend rapid fixer because, well, it’s quicker! Which one you choose is pretty much up to you, they don’t really differ much. For a long while I used Ilford Rapid Fixer, but lately I’ve changed to a cheaper locally produced one by Argenti. At the moment I’m also researching eco fixers that are less toxic, because obviously that’s safer and better for the environment. Whatever fixer you choose, make sure it’s for film and not only for paper though!
3. Wetting agent
The wetting agent isn’t really that essential. If you have good soft water you might not need it at all. However, in most places it is a real help. After trying both Tetenal Mirasol and Kodak Photoflo I tend to recommend Photoflo because the Mirasol gets sticky if you use too much.
4. Distilled water
In some places where the water is really hard you might need distilled water for your last wash and the wetting agent. If you have a problem with limescale in your kettle or get a lot of limescale stains in your bathroom, then definitely use distilled water for the last step of the washing process and the wetting agent.
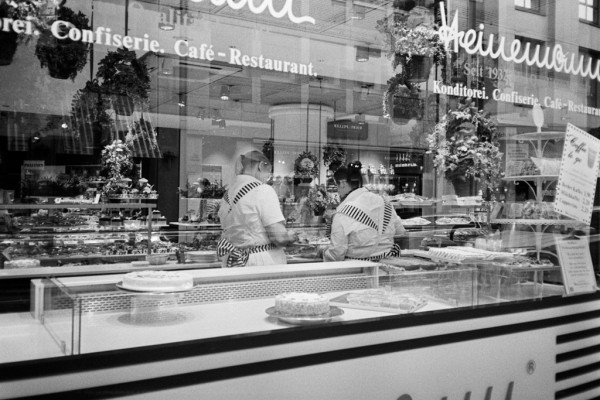
Olympus XA, XP2, Rodinal 1:100, 60min | © Lilly Schwartz 2014

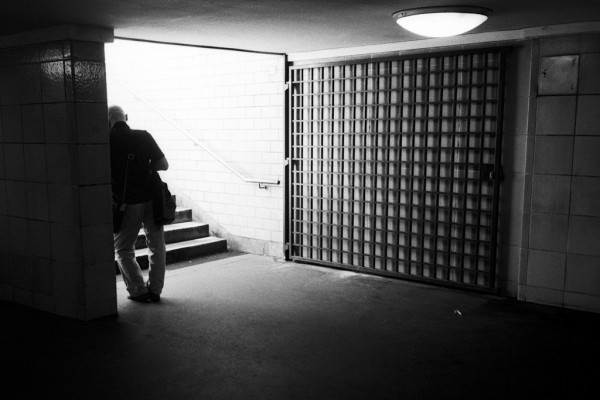
Olympus XA, Tri-X @800, Rodinal 1:100, 60min | © Lilly Schwartz 2014
Rolleicord V, RPX 400, Rodinal 1:100, 70 min | © Lilly Schwartz 2014
Now that we have everything that we need, let’s get started with this!
Step 0: SAFETY!!!
Most chemicals involved in film development are really quite toxic and you don’t want to get them on your skin, in your eyes or mouth. Whenever you handle chemicals, wear gloves and possibly glasses to protect your eyes. Fixer can also produce toxic gas, so only develop in well ventilated rooms! Taking care of your safety is important, especially if you are developing a lot of film. Do not develop film while pregnant and of course keep all the chemicals away from children or pets. YOU are responsible for your own safety and the safety of your loved ones, so do all of this at your own risk. Seriously, please take care and use some common sense while dealing with these chemicals. Toxic load can be minimised by wearing gloves and always using the least toxic chemicals available. If you are still worried about toxicity, despite wearing gloves and glasses, develop in Caffenol instead of commercial developers, use eco fixer and only use water as a stop bath. Also, please discard exhausted chemicals in an environmentally safe way. With all this said, don’t go nuts over the safety issues. If you use common sense film development is really quite safe.
Step 1: Loading the film
Now that we’ve talked about the serious stuff and you have everything in place, let’s get started on all the fun: The first and most fiddly bit is to load the film onto the spool. THIS HAS TO BE DONE IN TOTAL DARKNESS!!! I hope the bold script and exclamation marks got the message across. Don’t do this in daylight! Where to find a dark enough place? A bathroom without a window or a walk-in closet could be dark enough if you can prevent light from coming in through keyholes. If you’re not sure whether there is still some light leaking, then always load your film at night and turn off the light in the adjacent room. If there is no such place in your house, then the other option is to get a changing bag. I use one for added convenience, although I actually have a bathroom where I can do this. A changing bag is a double layered black bag with openings for your hands in which you can do all the loading as well. If you get one of those, make sure you get a big one. Mine is rather small and that can get slightly annoying.
For this step you need:
- Your developing tank with dry spools – don’t forget the lid!
- Total darkness! And no, a gothic attitude and black clothes are not enough!
- Scissors
- Optional: bottle-opener
Before you open the canister or pull the film out, familiarise yourself with the spools and the tank. Figure out how to pull apart the spools and from which side you need to load them. Also try the movement that feeds the film into the spool – for this you need to turn both sides of the spool in opposite directions. If you have a longer piece of junk film – wrongly developed or exposed film that you don’t want to keep – you can try loading it onto the spool in the light too. You also need to know how to put the spools into the tank and how to fasten the clip to hold the spools in place (if your tank has that). Also try to put the lid on, to see how tight it needs to be to be properly closed. You need to know how to do this by feel, so maybe try it with your hands under a pillow or table so that you can’t cheat.
FROM HERE ON IN DARKNESS!
First you need to get to the film leader. If you always rewind your film completely into the canister then you need a film leader retriever (which never works for me actually) or use a bottle opener to open the film canister. I prefer not to rewind my film completely, because I tend to re-use my canisters for bulk-loading. Once you have pulled out the film-leader or opened the canister, you need to cut the leader off in a straight cut. Make sure you don’t leave any sharp corners, because they tend to jam the spool. I always cut the corners off diagonally to prevent jamming, also with 120 film. By feel feed the film end into the opening of the spool – hopefully you have figured out the correct side already, but you will know by the time you try to advance the film into the spool. When you reach the end of the spool, cut it off the core. If you are loading 120 film, then use scissors to cut off the end that is attached to the backing paper – I have torn film by trying to remove the tape without scissors. Once you have the film on the spool (yes, I know, by magic? Believe me, you’ll figure it out!), put the spool on the tube in the middle of the tank, fasten the clip or put a second empty spool as a spacer to prevent the spool from moving in the tank. Finally close the lid.
Once the lid is closed and the film is on the spool inside the tank (!!!) you can turn on the light or take your hands out of the changing bag. The rest of the procedure can happen in daylight.
This was actually the most difficult step, so you can relax now! Please keep the film leader for the fixing step if you are developing 35mm film.
Step 2: Pre-soak.
Although this is not always necessary, I recommend that you always pre-soak your film. This makes the developer more effective, prevents stains from backing-paper and also makes sure that any contamination on the film or in the tank gets washed away. I usually just fill in some room temperature water while I prepare the developer and chuck it out when the developer is ready. Don’t worry if the water comes out a funky colour – this is precisely why we’re doing the pre-soak, so that this funky coloured stuff doesn’t end up in the developer!
Step 3: Developing
For this step you need:
- Protective gloves
- Bottle of Rodinal or at least 3.5ml for one roll.
- Measuring beaker or syringe that can measure 3.5ml of liquid.
- 1L measuring cup.
- Timer on which you can see the seconds.
- Optional: thermometer
While the film is sitting in the pre-soak, we now prepare the Developer. Please wear gloves during the rest of the process until you are done with the wetting agent. At box-speed we need at least 3.5ml of Rodinal per roll to make a dilution of roughly 1:100 depending on how much liquid you need to cover the film. These values are usually noted on the tank somewhere, often on the bottom. My AP tank needs at least 400ml liquid to cover 1 spool and 650ml to cover 2 spools of 35mm film. For one roll of film I will therefore use 3.5ml Rodinal to make up 400ml developer, for 2 rolls I will use 7ml in 650ml developer. For 120 film I usually just go with a straight 1:100 dilution, which means 6ml in 600ml developer. If you want to push the film, use 1ml more per stop pushed. How do you measure such small amounts? I use a 25ml measuring beaker for Rodinal, but you can also use a 10ml plastic syringe from the pharmacy.
A heads up about Rodinal: At the beginning the liquid will be clear, but the longer Rodinal stands, the browner it will get to the point of being black. With any other developer this would be bad, but with Rodinal it doesn’t make a difference, because it keeps for ages. I know people who still use bottles that were opened in the 1990s and that have crystals floating in them. Just make sure none of the crystals end up in your working solution.
Once you have mixed the developer, you can chuck the pre-soak water and fill the tank up with the developer. Once you have filled the tank you need to agitate for 30 seconds. I recommend that you invert the tank to make a full inversion every 3 seconds. I have tried different agitation schemes, swirling and inversions, faster or much slower and I had the best results with gentle but not too slow inversions. Too little or too much inversion will invariably result in uneven development, so be gentle, but not too gentle. If you don’t know what a 3sec inversion looks like, I recommend that you watch the animation in the massive dev chart app. You can see the animation also in the demo of the app at time index 1:19. This 3 second inversion has served me best with a lot of developers actually. For Rodinal, you can also go with 1sec inversions if you want a bit more pronounced grain, but I suggest that you don’t go much slower than 3sec, since you will get uneven development with slower agitations and some films (especially Tri-X).
After you are done with the inversions, put the tank on the sink top and give it a little nudge to dislocate any bubbles. After this leave it standing without touching it for 30 minutes. Don’t forget to set your timer!!! After 30 minutes give it only 1 single 3sec inversion and leave it to stand for another 30 minutes. And again, timer!!! This one inversion technically makes it semi-stand development, but believe me, without it you would most likely get into trouble with uneven development.
Total development times are these: ISO 400/800 60min, 800/1600 90min, 1600/3200 120min, 3200/6400 150min. When pushing I suggest that you do a slow 5sec inversion after every half hour. These times are starting points and should give you usable negatives with most films. Some films like Kentmere 400 / RPX 400 might need a little more like 65-70 min, others like Double X at ISO 250 a little less. If you’re unsure always do a test roll of the film brand in question before developing anything important!
Although the temperature is generally not as important as with other developers when you’re stand-developing in Rodinal, you shouldn’t really go higher than 25°C without adjusting the development times. I have read somewhere – sadly can’t remember where – that the development time should be halved at 30°C, so at 25°C maybe some 10-15 minutes less would also work. I myself always develop at 20°C to keep things predictable.
If you opted for HC-110 instead of Rodinal, I sadly don’t have any experience with exact dilutions and times, but there is a good description over on hjlphotos with lovely results. The development method is the same, but the dilutions and times will be slightly different and I don’t know whether the times are different for specific film brands. However, the temperature is likely to be more important than with Rodinal.
Caffenol-CL is a slightly different animal, because it has to be mixed from ingredients (to make 650ml: 26g instant coffee, 6.5g vitamin C, 10.4g washing soda and 0.65g potassium bromide) – I can’t really go into the details here -, but the principle is definitely the same. With Caffenol-CL it is important to start at 20°C and there doesn’t need to be an inversion at the halfway point. Here times seem to depend more on the film though. Tri-X and Double-X worked much better for me with 30min semi-stand with 3 inversions at 1,5, and 15min, but Kentmere 400 is just lovely at 60 min full stand.
In any case, whichever developer you choose, once the development time is over, you can dump the developer and move on to the next step. All the next steps are the same for normal development by the way.
Rolleicord V, Tri-X, Caffenol-CL, 30min semi-stand | © Lilly Schwartz 2014
Zorki 4K, RPX 400, Caffenol-CL, 60min | © Lilly Schwartz 2014
Zorki 4K, Kentmere 400 @3200, Rodinal 1:100, 150min | © Lilly Schwartz 2013

Zorki 4K, Delta 3200 @6400, Rodinal 1:100, 75min | © Lilly Schwartz 2014
Step 4: Stop Bath
Some people use an actual stop bath that you can buy just like any other development chemical. I personally have never used a chemical stop bath and never ran into problems. Instead I just use water as a stop bath, because this way the fixer also produces less toxic gas. For the stop bath I fill the tank up with water and invert 10 times, dump the water and repeat 2 more times. The timing of these inversions isn’t essential, just do them as fast as you want. The water changes are important though. If you don’t change the water, your fixer is more likely to get contaminated with developer and doesn’t last as long. This is especially the case for Caffenol, so keep changing the water until the water runs clear.
Step 5: Fixing
For this step you need:
- Fixer
- 1L measuring jar
- Timer
- A bottle in which you can store the fixer.
Before we move on to fixing, we first need to prepare the fixer. For this, read the instructions of the fixer for the correct strength of the dilution for fixing film. Ilford Rapid fix has a 1+4 dilution, which means, 1 part of fixer to 4 parts of water. For my 650ml developing tank I use 130ml of fixer and fill the rest up with water. If this sounds a lot then keep in mind that you can and should re-use the fixer! And don’t forget to rinse your measuring jar thoroughly, if you’re using the same one for developer and fixer.
Before you put the fixer into the developing tank, let’s do the film leader test to see how long you need to fix the film. Remember that you were supposed to keep the film leader after cutting it off when loading the film onto the spool? Well, you need it now. Also, turn on the timer! Now, dunk the undeveloped leader about halfway into the fixer for 10 seconds and then let it fall in and measure the time until it takes to become entirely clear. Dunking it in halfway makes this more visible. The minimum fixing time is double the clearing time + 1 minute for safety. Since it doesn’t really matter whether you leave the film in for too long, as long as you don’t go too much over, I usually just fix for 5min with freshly mixed fixer and do the leader test only every few rolls or if I change film brand. For 120 I often add another minute just for safety, because the base is thicker. If the clearing time goes beyond 2min you should increase the time to 6 min. I personally re-use my fixer to total fixing times of up to 7min. I normally don’t go over that because I don’t trust lengthening the fixing times more than twice. With these times I can usually fix about 15-20 rolls of film depending on the brand. Some film brands like Kentmere 400 need very little fixing time whereas others like Tri-X take quite a bit longer and exhaust the fixer quickly.
Now that we know the exact fixing time, we go ahead with the fixing. Chuck out any wash water that might be still in the tank and fill the fixer into the tank. Agitate for 10 seconds every minute starting immediately after filling in the fixer. You can either use the fixing time just calculated with the film leader test: fixing time = 2*clearing time + 1min, or just go with 5min for freshly mixed fixer if you want to play it safe. After your fixing time is over don’t throw the fixer out, fill it back into the measuring cup and then into a bottle for storage. Don’t worry if you use Caffenol and the fixer suddenly smells of coffee and comes out with a slightly brownish tint. That’s quite normal because coffee is a rather strong dye. The fixer will still work fine.
After (!!!) you’re done with the fixer you can actually take a peek at the negatives if you want, because it is safe to open the tank now! Don’t pull them off the spool yet though, they still need washing!
One thing about chemical storage: You want to have as little air as possible in the bottle with your fixer, since chemicals lose their strength more quickly when they are in contact with air. I myself use a 600ml Jobo bottle to store 650ml fixer and fill it so full that it’s almost flowing over. This makes sure that my fixer stays fresh longer. This same rule applies to any other chemicals you might want to store like other types of developer that don’t have quite as amazing keeping properties as Rodinal. The best bottles to store chemicals are dark folding bottles that you can compress to minimise the air in the bottle.
Step 6: Washing
The last step to ensure that your negatives keep for a long time is to wash the negatives. You don’t want any fixer to stay on the negatives or they will deteriorate. Originally washing happened under running water for 10 minutes, but there is a water saving alternative that I prefer to use: the Ilford method. For this method you fill the tank with water and invert 3 times, change the water and invert 6 times, change and 12 times until finally you agitate 24 times. After inverting you need to leave the water standing in the tank for about a minute before you change it. This means that this step takes at least 4 minutes plus the time it takes you to do the inversions. Important if you have hard water: Do the last change of water with distilled water!
Step 7: Wetting agent
For this step you need:
- Wetting agent, I recommend Photoflo
- 1L measuring jar
To ensure stainless drying we do a bath with wetting agent as the last step. Follow the instructions of your wetting agent and don’t forget to rinse your measuring jar! Often the dilution is rather cryptic, so remember that it usually takes very little. I never take more than 1 drop of Photoflo for 650ml, but this might be different for your wetting agent. If you have hard water, then do this with distilled water! Before pouring in the wetting agent solution, take off the lid and make sure all the other water is out of the tank. You don’t need to put the lid back on. The negatives should sit in the wetting agent bath for 1 minute.
Step 8: Hanging the negatives
For this step you’ll need:
- A place where to hang the negatives
- Film clips / clothes pegs
A good place to hang your negatives is usually in or next to the shower. To minimise dust in the air you can quickly run some hot water to steam up the bath, and then hang the negatives there. Not sure where to hang them from? Well, I used a bit of string to hang my film clips from it in the shower. A clothes hanger from the chemical laundry that you can bend a little could also work. What you want to avoid is dust or animal hair. If you have pets, definitely keep them out of the area where you develop already for their safety! They might actually try to lick up spilled chemicals and you definitely don’t want that! Also, don’t leave the negatives hanging for too long or they will accumulate dust. After drying you can cut the negatives and store them in negative sleeves.
If you still get water stains despite the distilled water and the wetting agent, you can try two things before hanging your next batch:
1. Use a salad spinner. Spinning the spools in a salad spinner gets rid of quite a bit of water, but sadly not all of it. It is a handy trick that really helps to prevent big stains.
2. Use a film squeegee. I’m actually not a big fan of those and I’m always worried to scratch my negatives, but it is a rather reliable way to prevent stains. Just make sure the blades of the squeegee are free of dust and don’t use too much pressure!
Step 9: Clean up!
Make sure you give all your equipment a good rinse with hot water. Most importantly, if you use plastic spools, you actually need to scrub your spools every now and then because the chemicals and especially the wetting agent builds up on them over time and this might affect subsequent development! I use an old toothbrush for that basically after every batch I develop. Also, make sure to clean up any spills. These chemicals are really quite toxic and you don’t want to accidentally get them in your eyes or mouth, because you forgot to clean up properly!
And now you’re done!
Conclusions
Personally I’m a big fan of stand-development in Rodinal. It’s how I started my forays into film development and it was a good starting point for many experiments that followed afterwards. It was good to know that I could just get results without fiddling with the agitation scheme for ages or bothering too much about my times or temperature. Also, whenever I get difficult lighting situations where I don’t really know whether I exposed the roll correctly, Rodinal will definitely save the day.
Somehow I have also never really gotten warm with normal development, although I have made my way through a bottle of Tetenal Ultrafin. Although normal development is faster, I prefer to just let the developer do its thing while I do mine in the meantime. Yes, normal development in certain developers produces slightly less grain, maybe there is more contrast or in some cases even slightly better tonality. Nevertheless I keep coming back to my good old friend Rodinal, because it’s just so easy and convenient.
Lately I have also fallen in love with Caffenol-CL and I’m sure there will be much more experimentation with this in the future. I like that it produces slightly more contrast than Rodinal and that there is a distinct mad scientist feel about it. After all, developing film in coffee, how cool is that?! And maybe at some point I will complete the stand-development trinity and try some HC-110 as well.
I hope this little guide to film development / stand-development was interesting for you and maybe gave you an incentive to start developing your own film. One thing is for sure: it’s much easier than you think. You just need to give yourself a little push to overcome your fear of the unknown!
Olympus XA, Tri-X, Rodinal 1:100, 60min. © Lilly Schwartz 2014
Olympus XA, Tri-X@800, Rodinal 1:100, 90min. © Lilly Schwartz 2014
Zorki 4K, HP5+, Rodinal 1:100, 60min | © Lilly Schwartz 2013
Zorki 4K, T-Max 400, Rodinal 1:100, 60min | © Lilly Schwartz 2013
Zorki 3C, HP5+, Rodinal 1:100, 60min | © Lilly Schwartz 2013
Great post! I will use this.